GROVE
Responsive Multi-Purpose WordPress, WooCommerce Theme
Thank you for purchasing our theme. If you have any questions that are beyond the scope of this documentation, please feel free to us via email. Thanks so much!!
Files included in the download package
- The theme zip file GROVE.zip(included Visual Composer and Revolution Slider plugins)
- Import file Revolution Slider(RevSliders.zip file)
- Documentation.zip file
- Directory child theme in grove-child.zip file
Installing the GROVE theme
FIRST, GROVE is a Wordpress theme and must installed into a Wordpress framework, so make sure you have already installed Wordpress 3.9 or higher. If you haven't already done this, go to
Wordpress.org for a free download and installation.
Download GROVE Theme
Get the GROVE Theme installation package from your account(after login) downloads page and save it to your computer.
Since WooCommerce and other plugins needed are already packed in the download file, you won't need to go download them individually.
Upload GROVE Theme to hosting
You can upload the GROVE file:
1. Via Wordpress - Log into your Wordpress site via url http://yourdomain/wp-admin:
When you get to your Dashboard, scroll down the left sidebar to the Appearance Panel and hover or click on "Appearance". You will be able to see the sub-menu in the picture below:
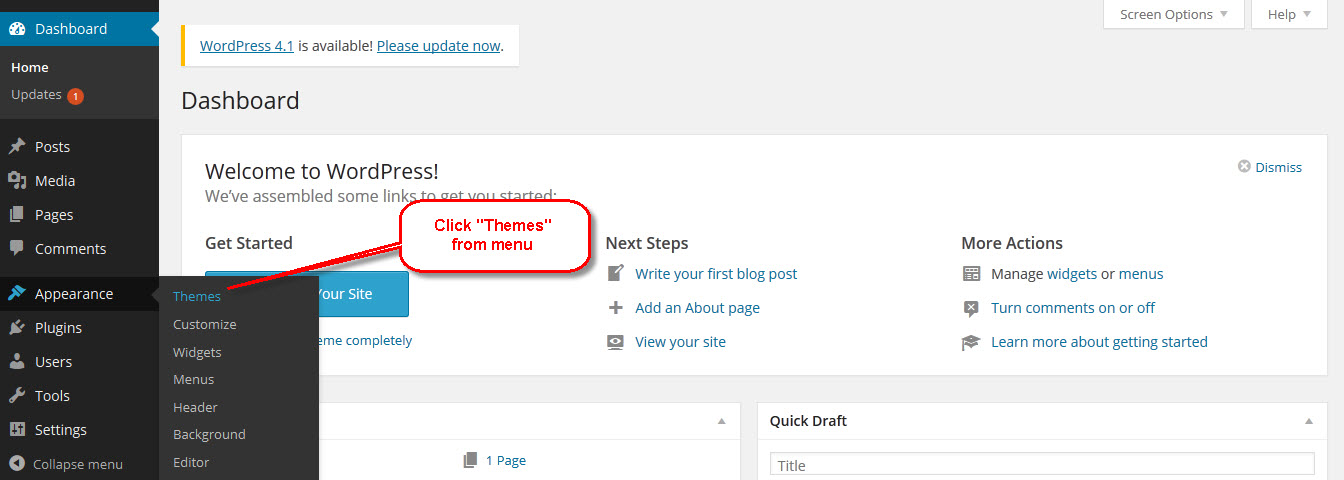
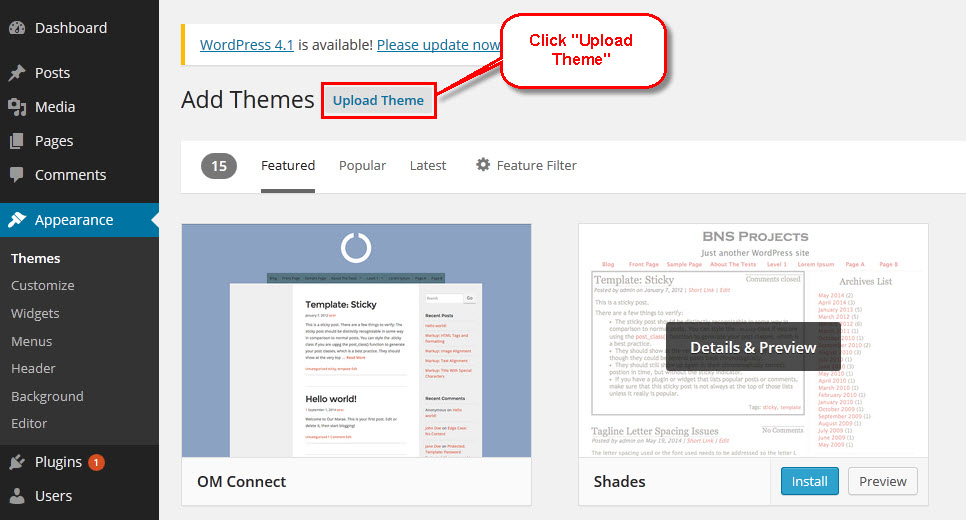
Click "Themes" as above image and will see an "Add New" button.
Click "Add New" button, then click on "Upload Theme"
Click "Browse" and find the GROVE.zip file location on your computer.
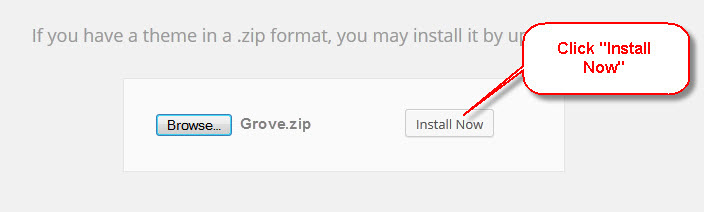
Now you just have to click Install Now and wait for your theme folder to be uploaded and unzipped. The process might take some minutes, so please be patient.
2. Uploading Via Filezilla
(SKIP THIS STEP if you have already successfully uploaded GROVE theme via Wordpress) - Now you will learn how to upload your
files using the Filezilla client.
First, BACKUP YOUR FILES!Should do it before set up anything, this is always the safest.
Next, download and install the Filezilla Client from http://filezilla-project.org/
Now OPEN FILEZILLA to see this window:
Fill in your FTP information, like in the image below:

Click "QUICK CONNECT", here is screen after login:
Use the right side panel to navigate to the Worpdress theme folder on your server. In the example above, the Worpdress theme folder is public_html/wp-content/themes/. However, not all web hosting have public_html, it may have a different name in your server.
After you get to the Wordpress theme folder, use the left side panel to locate where you extracted the theme folder from the downloaded zip file into. In this example, the theme folder is on the desktop.
Drag it into your web hosting:
Note: you may be asked if you want to overwrite files and/or folder. Tick the option to "Always
use this action" and click on "Ok", then wait until all files have been uploaded.
Install GROVE Theme
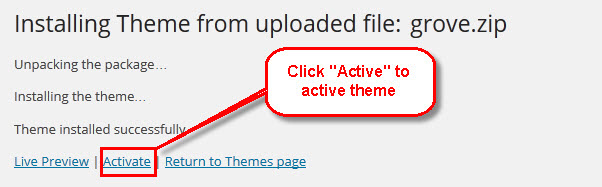
If you chose to upload GROVE with Wordpress uploader(via step 1 above), then wait for the notice below to appear and then click the link "Activate".
In cases where you uploaded the files with other FTP tools, open the Wordpress dashboard and navigate to Appearance>>Themes. You can activate GROVE from the theme choices there.
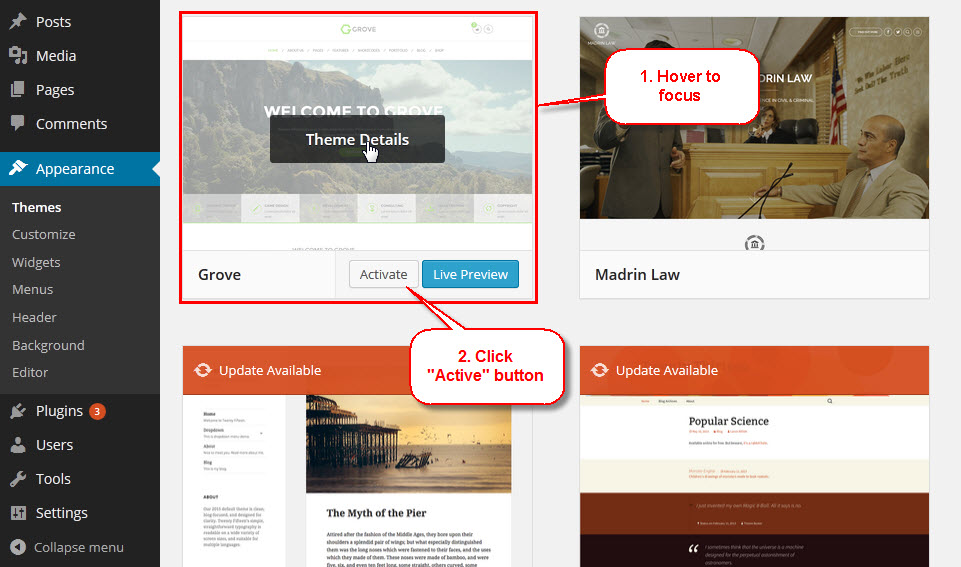
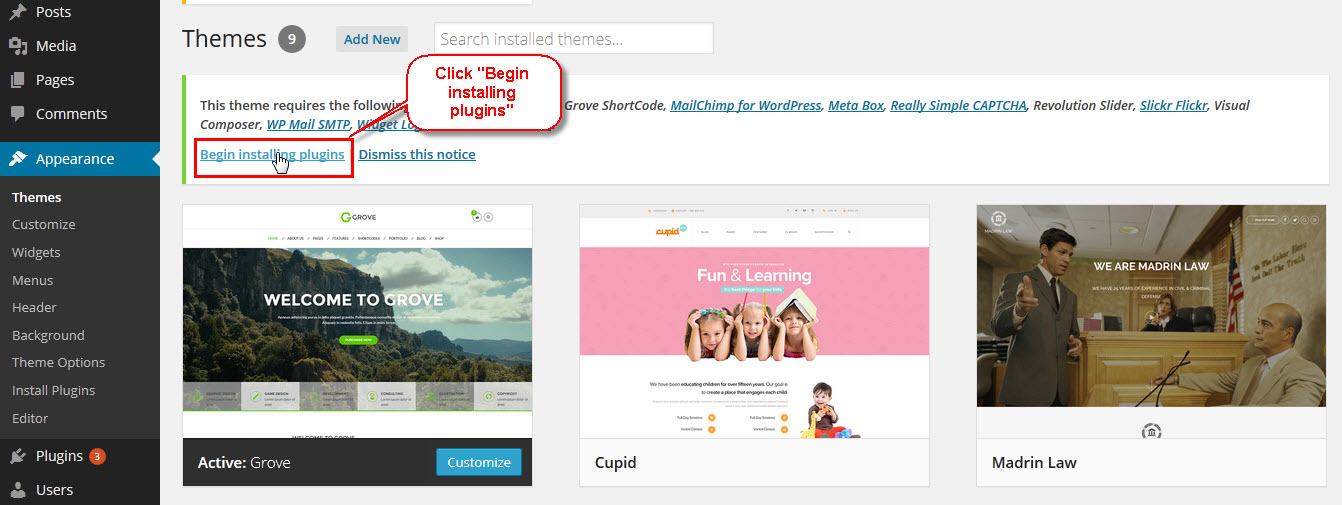
Hover on the GROVE theme screenshot to view the "Activate" button and click on it as above image. A notice will appear as image below and asking you to install some required plugins.
Click "Begin installing plugins" to next
Install GROVE Required Plugins
All plugins required have been zipped/already into your download package, so you only need to do is click on the "Begin installing plugins".
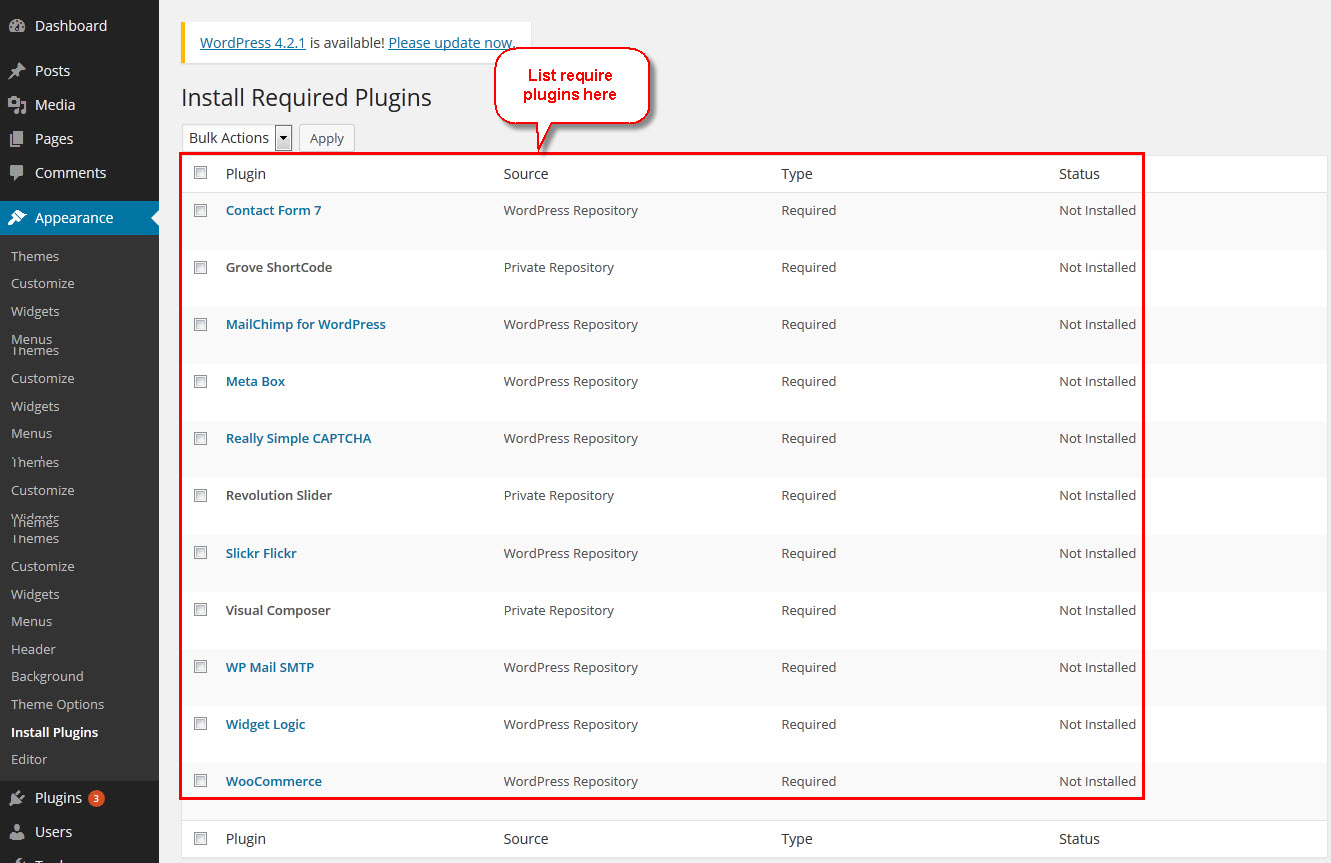
You should be navigated to the Install Required Plugin page, which shows a plugin list similar to this:
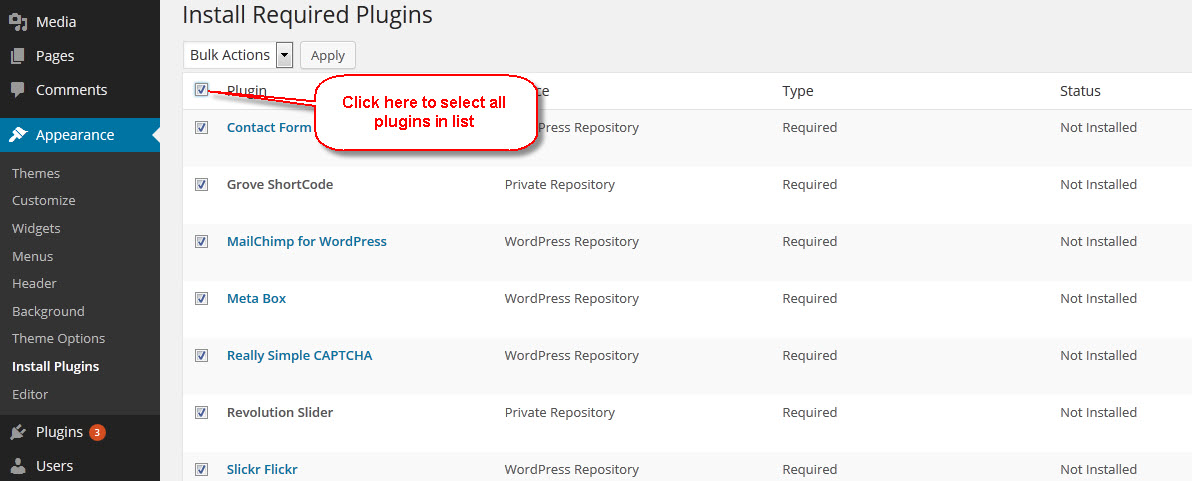
Next, Click on the checkbox beside "Plugin" label to select all plugins in the list.
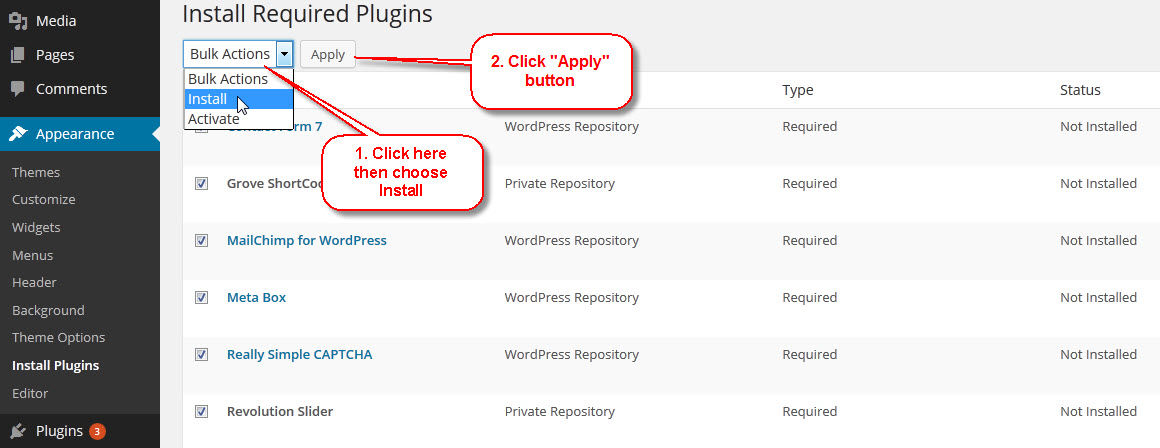
Then choose "Install" from the drop-down list at the top and then click "Apply".
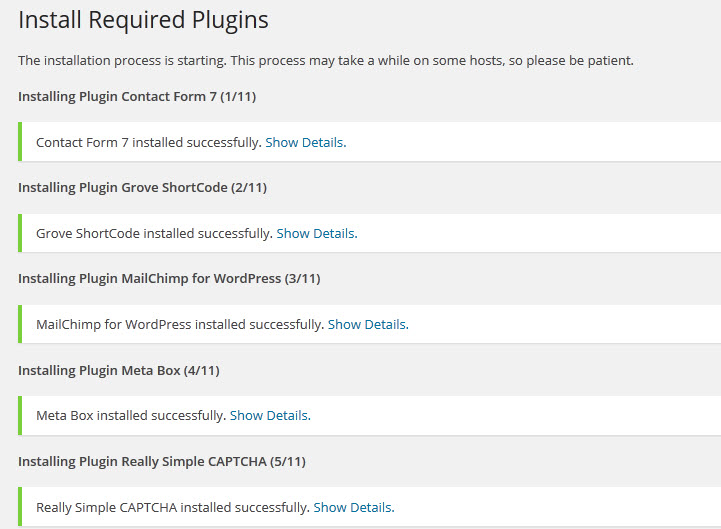
The installing process status will be shown in your browser. It may takes a few minutes, so please be patient. After sucessfull, your screen like that
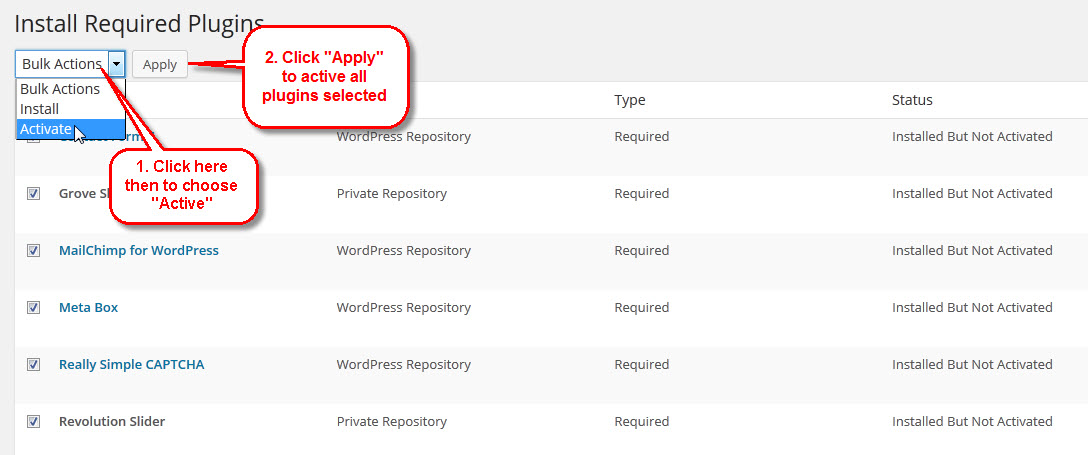
When the notice "All installations have been completed" appears, click on the "Return to Required Plugins Installer" link to turn back to the plugin list.
Next, click on the box beside the Plugin label again to select all plugins and choose Activate this time.
Upon installation WooCommerce creates the following new pages:
WooCommercePages
- Cart
- Checkout
- -Checkout >
- -Order Received
- My Account
- -Change Password
- -Edit My Address
- -View Order
- Shop
- Track your Order
These pages are setup with WooCommerce page shortcodes.
When the system gives you the notice that all plugins are activated, we are ready to proceed to Install Demo Data.
One Click Install Demo Data
WARNING!!! THE BEST, PLEASE SET VALUE FOR VARIABLES BELOW IN PHP.INI BEFORE DO THIS FUNCTION
upload_max_filesize=30M
max_input_vars = 10000
memory_limit = 128M
max_execution_time=100000
max_input_time=100000
With GROVE, you can build a functioning website just by clicking a button and install our demo data. Your GROVE installation will
be set up with what we have on our demo website, and you can use it as a template to develop your own website.
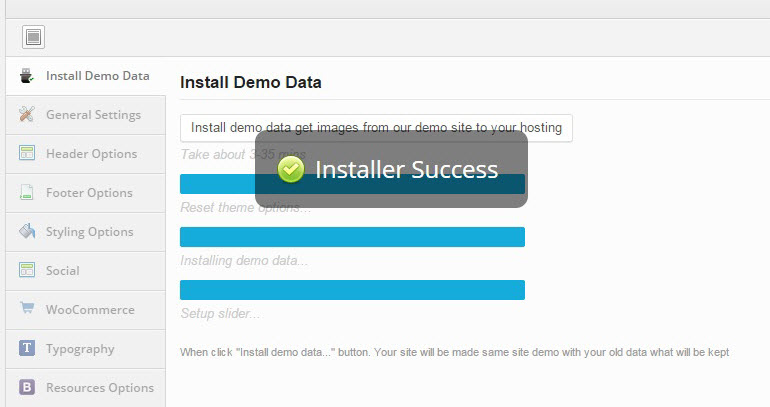
The "Demo Data Import" button can be found in Theme Options
And
As you can see in the picture above:
- Install demo data with all the images downloaded to your hosting, making your website look exactly
like what we have on our demo page.
The progressing would be displayed on import status bars so you will know when it is finished and your data is ready.
Next, go to Appearance > Theme Options > Click button "Options Reset" > Click "Generate Less to CSS" > Click button "Save All Changes".

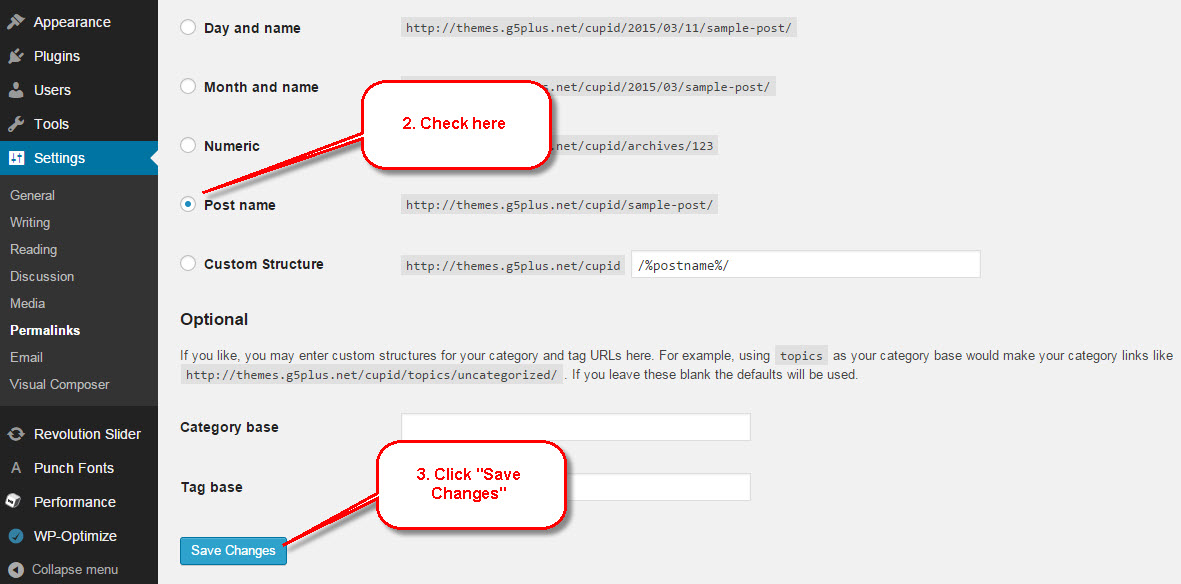
Last step, go to Settings > Permalinks > Click "Save Changes" button. Done.
Now, you can visit your website to view demo.
CONFIGURATION
GROVE Options
By clicking on the "Theme Options" menu under "Appearance", you'll be able to change all template specific settings.
General Settings
"General Settings" tab is divided into a few sections. Asides from the Install Demo Data section mentioned above, there are a few important sections for you to customize your layout.
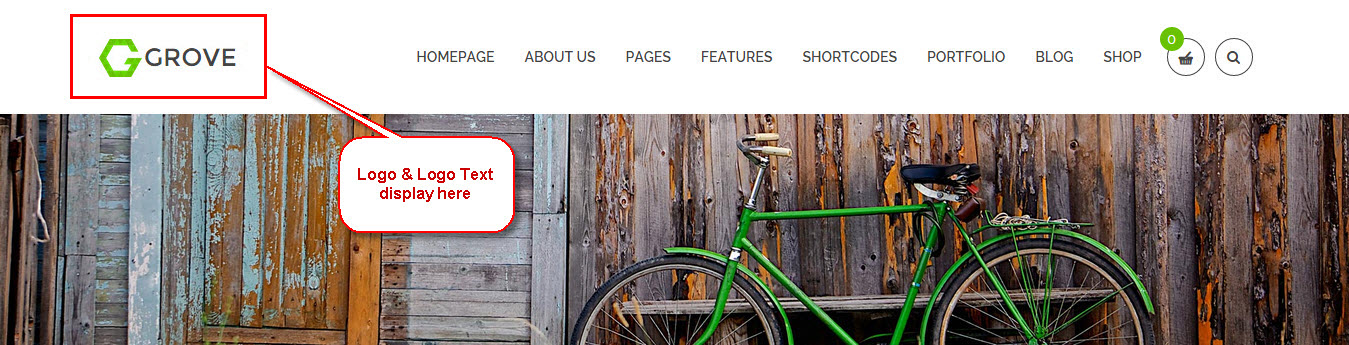
Header and Footer logo
You can upload this Logo on your server, or just paste an URL into the Logo box
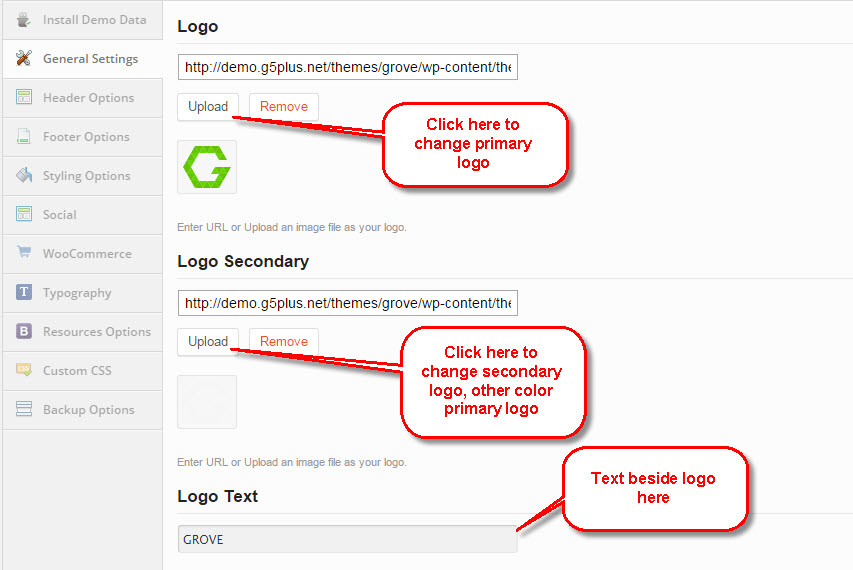
Header Logo will display as below
Favicon and Archive Style, Layout
Page, Portfolio style
Page Title Style, Page Title Background, 404 Background
1.Page Title Style 01: frontend display
2.Page Title Style 02: frontend display
Header Options
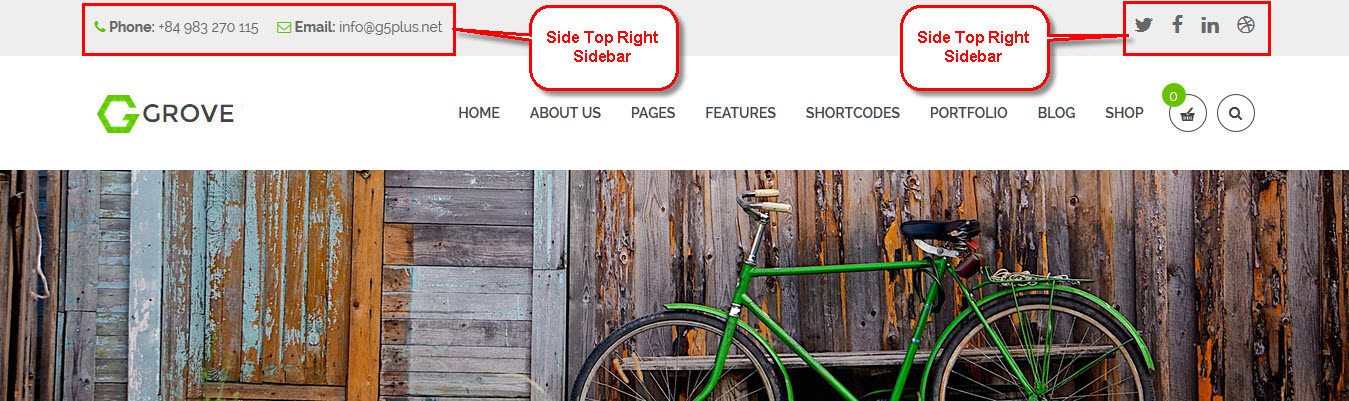
GROVE provide 20 headers style as you see image(screen show only some types for example) below. User can choose one of them
Footer Options
With Tracking Code: is an awesome feature to help with the SEO process for your e-commerce website. You can paste your search engine tracking code here to help raising your rank on their listing page.
Styling Options
In this section user can choose layout Boxed/Wide, Dark/Light style, Background images/Background Pattern, and choose primary color, secondary color for entire website.

Show Panel Selector Style: frontend display
Social
These options are for a box that enable people to share your blog content on various social networks which automatically shows up under the content blog posts, an important function that helps promoting your site. You can also check the options to decide which network they are allowed to share the content of your website on. You can also turn off all options if you don't want your content to be shared at all.
Social Link frontend display

Woocommerce
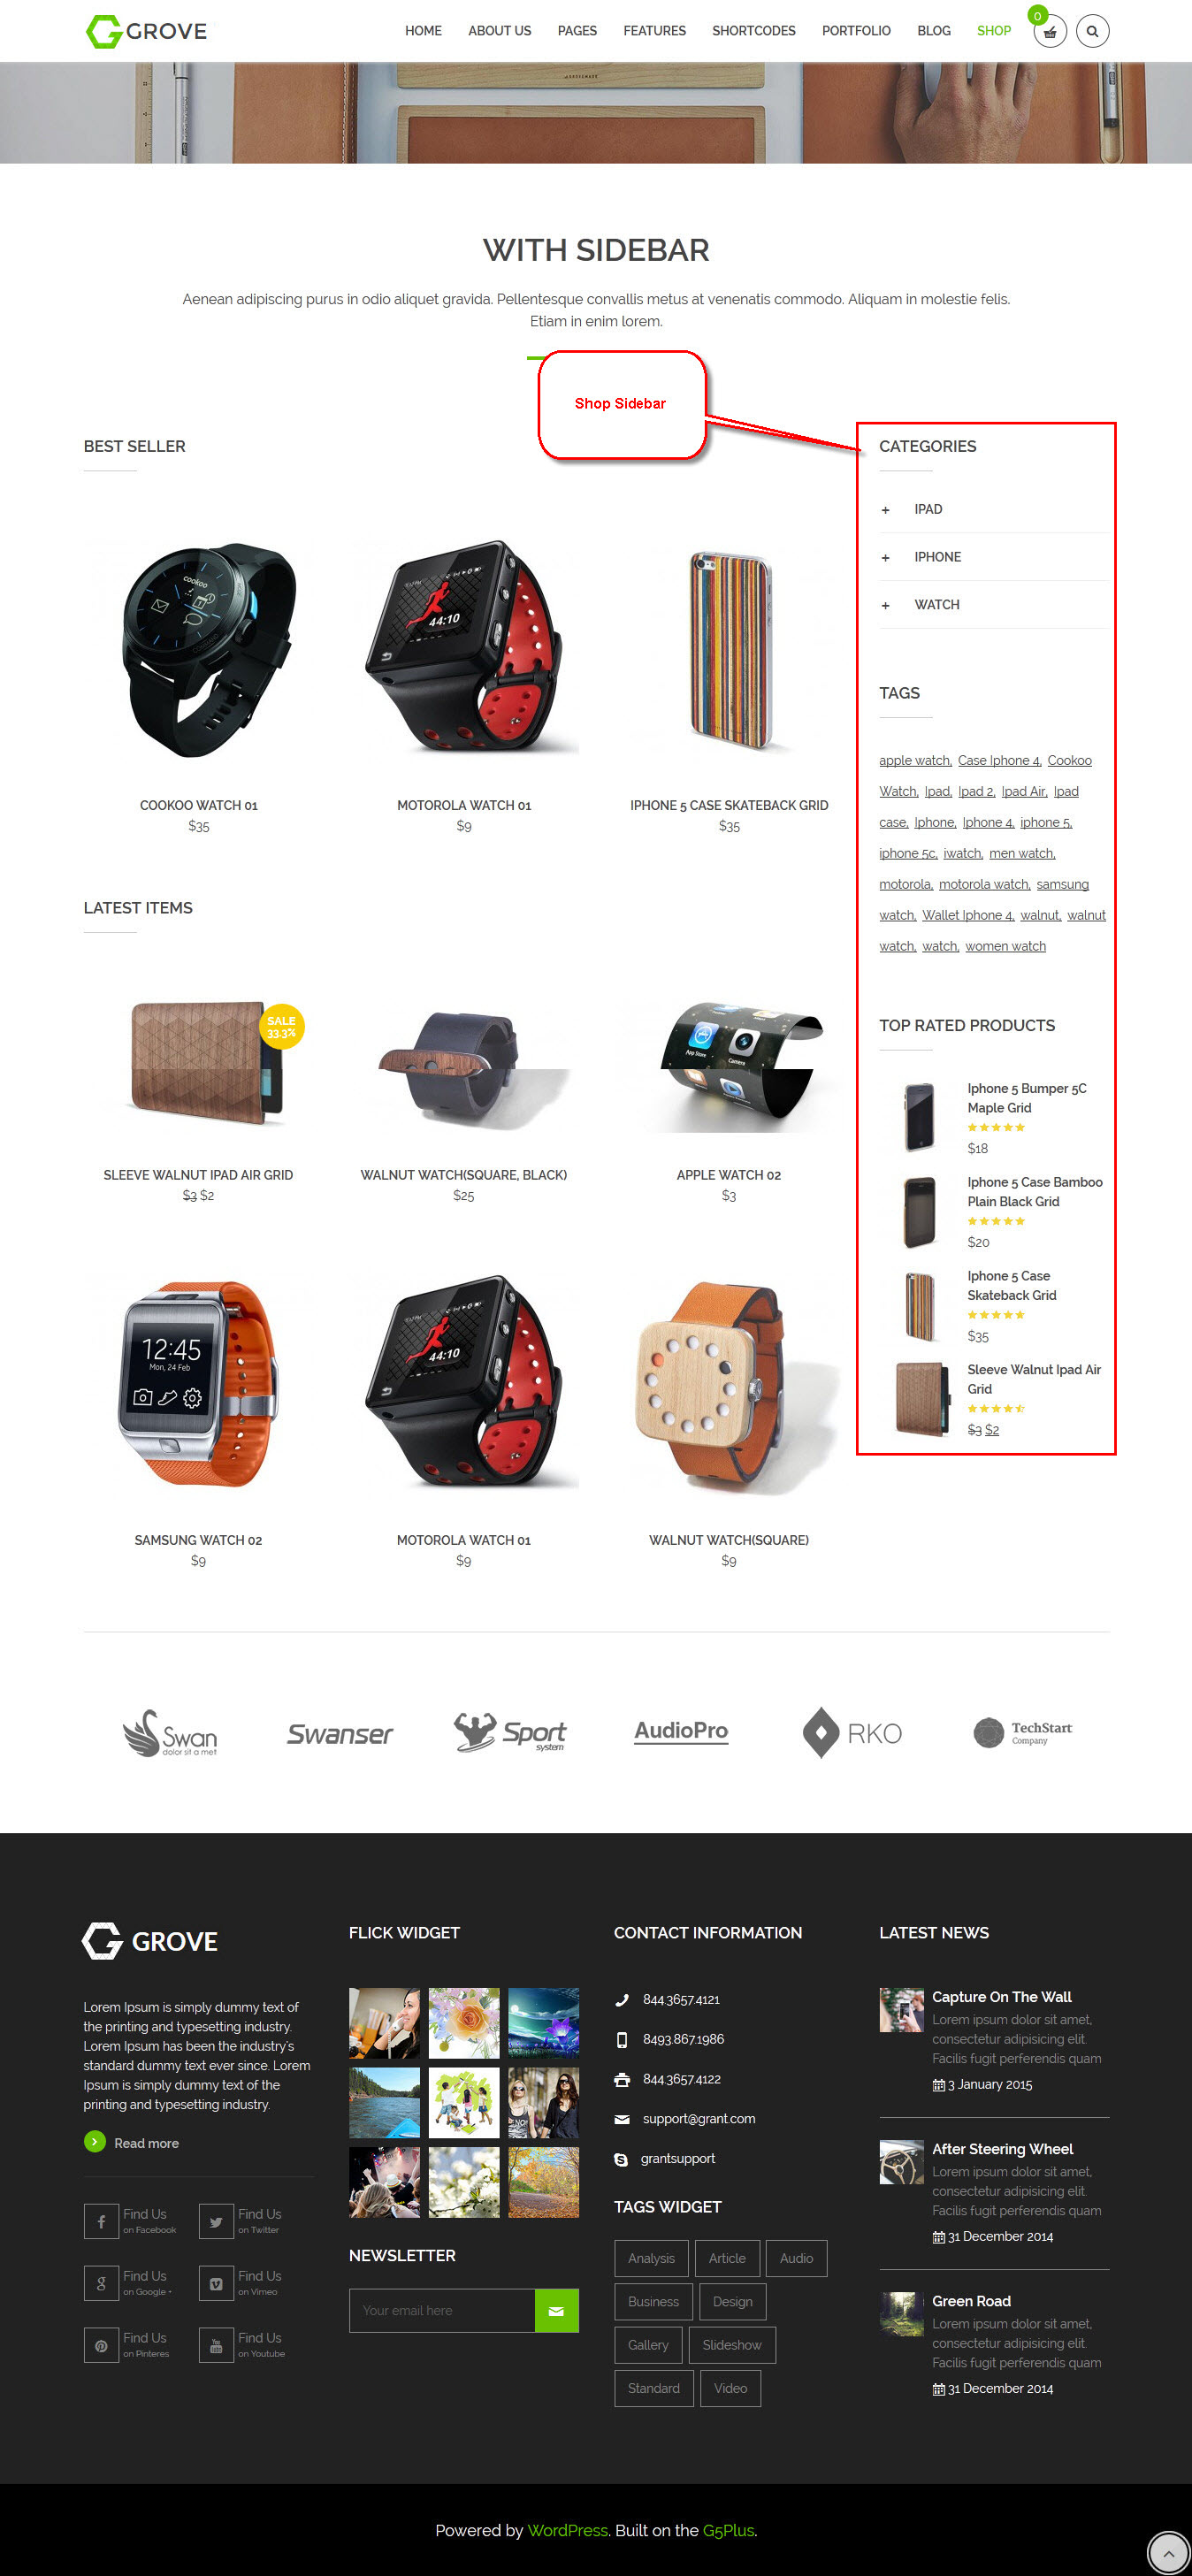
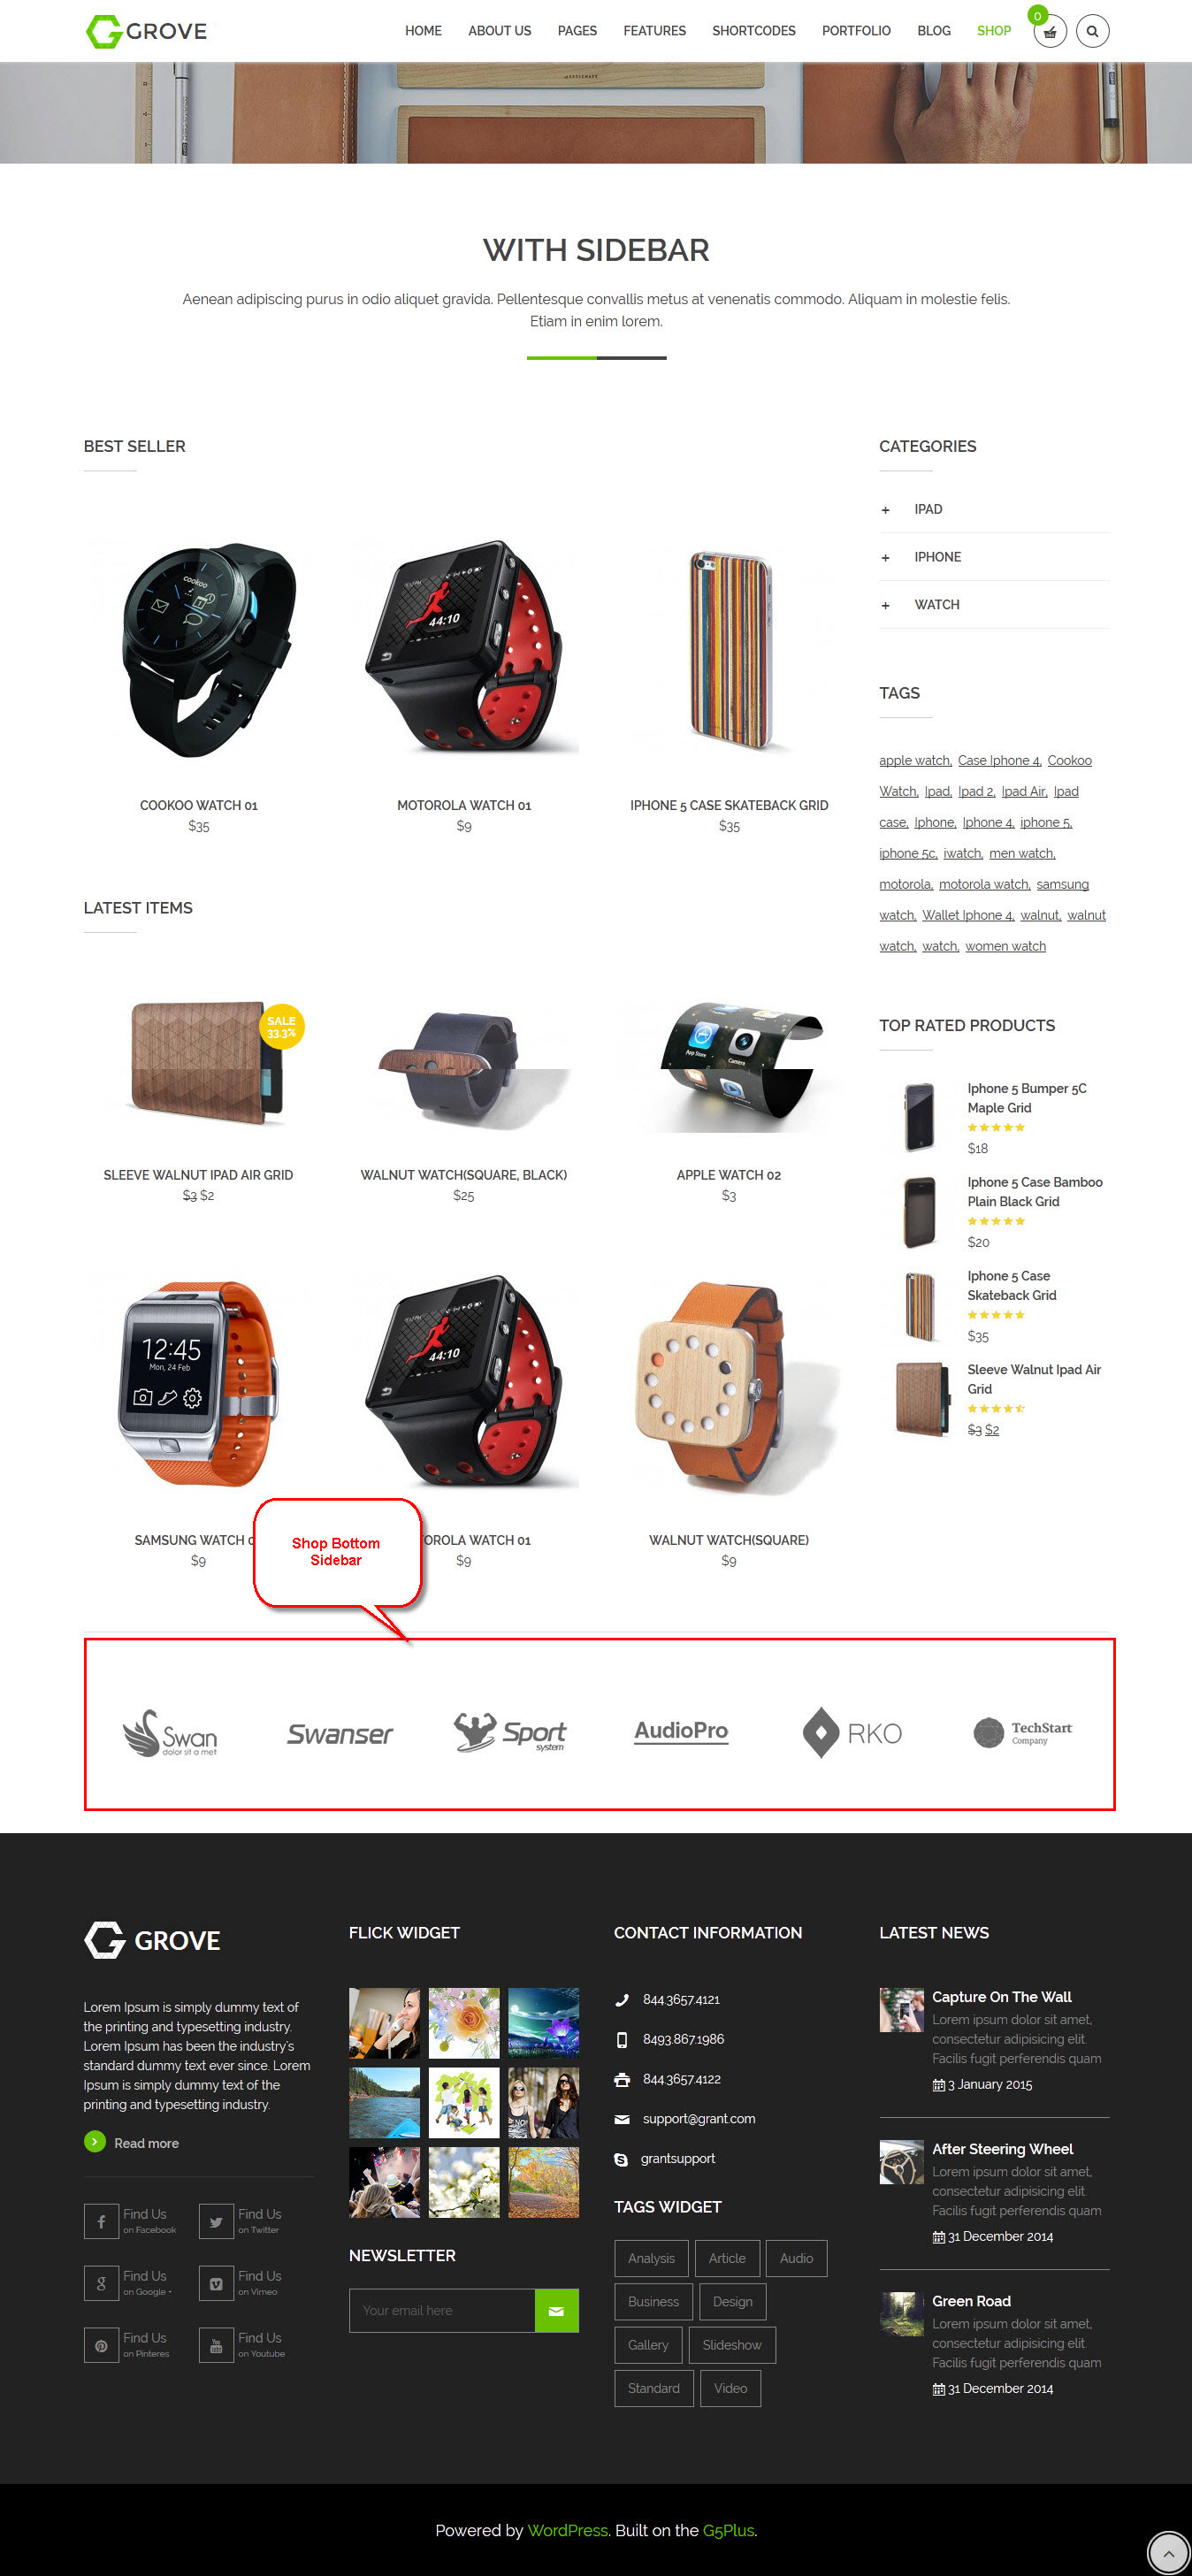
Pick a style in this box and Page Title Background for your product image.

Shop Page Title Background: frontend display
Typography
The Typography section gives you the control to style general text in your website. You will style the common text in your posts and pages with Body Options, and Headings Options will help you style the headings in your posts(Body, Heading, H1-H6)
Resources Options
Resources options let you utilize boostrap elements to style your store quick and easily
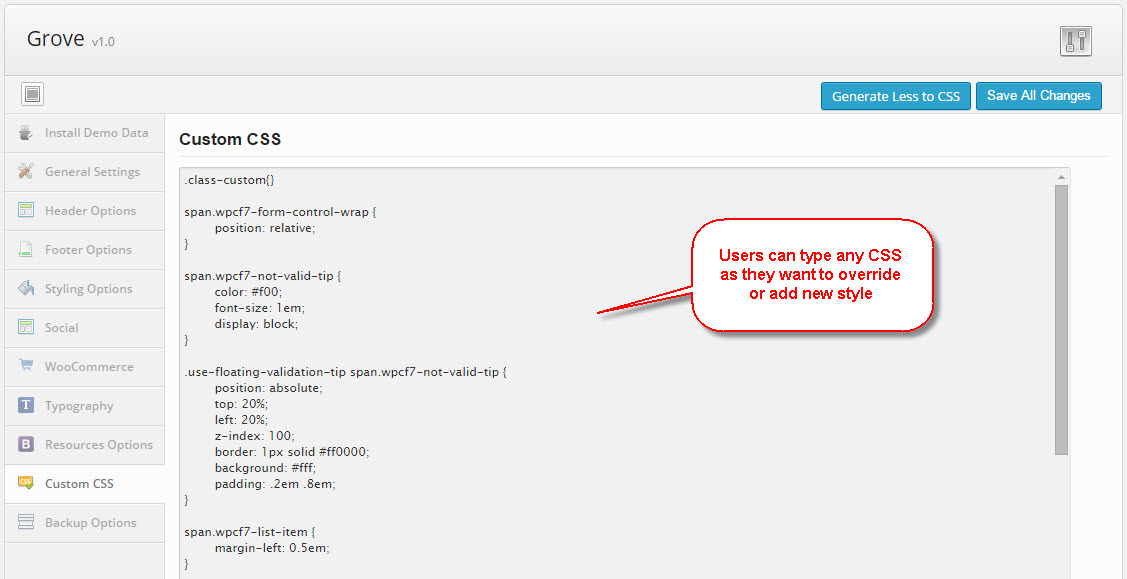
Custom CSS
In case you want to add new CSS class to your website, add it in this text box. This will overwrite the theme CSS, so please be careful!
Backup and Restore Options
You can back up the options you chose here and restore them later, in case you want to fiddle with it.
You can even swap data between different installations by pasting the text in the box under Transfer Theme Options Data and click Import Options button.
Settings MailChimp Options
Step 1: Choose menu as:
Step 2:
Step 3:
Step 4:
Step 5: Paste code html below to field "Form mark-up"
Step 6:
Step 7, the last:

Add New Contact Form and Setting Options
You can visit Contact Form 7 Plugin to further details.
Value Content Contact Form 01
Value Content Contact Form 02
Settings For Send Mail
You can visit WP Mail SMTP Plugin to further details.
WooCommerce Settings
Inside this panel you will find all the core WooCommerce settings such as: catalogue settings, pages, payment gateways, shipping methods and tax rates, accessible via the tabs at the top of the screen.
To configure your shop go to "WooCommerce > Settings", then browse through the tabs below to get more information on the WooCommerce Options and then click Save changes.
Next, open Products tab, config "Product Image Sizes" property as below then click "Save changes" button
Futher details, please read WooCommerce docs
Import Demo Content
If you are new to WordPress and have problems with setting up the theme you might want to import the demo content file that comes with the theme. The following actions will import some dummy posts and pages from the live preview:
- Go to menu Tools > Import
- Select WordPress from the list
- If you haven't installed the WordPress import plugin, a popup window will appears and ask you to install it. Just click Install Now. When the installation progress is completed, click Activate Plugin & Run Importer. If you have installed this plugin, skip to next step.
- Click Browse and select demo-content.xml file from the download package
- Click Upload file and import
- When you are asked to import author, you can create new author or import to existing author. You also should check the Download checkbox and import file attachments.
Select WordPress from the list

Continue with steps in image
Display asked to import author, selected and continue
After completing all above steps, open frontend link to see the pages imported to make, look like below is ok
If you don't want to use the demo content pack, you can read the instructions on how to work with our theme built-in Page Builder below to make your own pages.
Build Pages in GROVE
GROVE uses Visual Composer as its visual page builder, you can take full control over your WordPress site and build any layout you can imagine with drag and drop page builder plugin – no programming knowledge required.
Visual Composer
Visual Composer is plugin developed by WP Bakery that adds a drag & drop page builder to WordPress theme. It gives you the tools you need to be able to create complex page layouts without needing to touch a single line of code.
Please visit this link and watch demo video to know more how it work.
Asides from the default elements that Visual Composer provides, we also offer our special Shortcode for customers
Pricing Table Shortcode
This shortcode have 2 styles, can custom item show, get content from post type. Choose animation display, icon and custom text color, background color, icon color, feature background color, feature color.
Style 01 & Style 02: frontend display
Our Team Shortcode
This shortcode have 3 types display(List, Slider, List With Filter), and 3 Layout style.

1. Style 01: frontend display
2. Style 02: frontend display

3. Style 03: frontend display
Portfolio Shortcode
Have 3 types display(Grid, Info, Timeline), 3 hover styles(Logo and Excerpt, Portfolio Name, Icon View), Dark/Light style, can get content from categories, choose animation and decided number item to show.
1. Style 01: Grid Layout, Show Category, Show Paging, No Padding frontend display
2. Style 02: Info Layout, With Padding frontend display

3. Style 03: Timeline Layout frontend display

4. Hover(Overlay Style): Logo and Excerpt frontend display
5. Hover(Overlay Style): Portfolio Name frontend display

6. Hover(Overlay Style): Icon View frontend display

More Shortcode we built on GROVE: CountDown, Partner Carousel, Video Background, IconBox, Pie Chart And More...
users can view demo at Menu Shortcodes. Each shortcode easy to understant and custom.
These Shortcode for WooCommerce
Best Seller Product Shortcode
Get list best selling product on sale

Top Rated Product Shortcode
Display item products have hight rating by customer feedback.
Recent Product Shortcode
Display item latest in website

Other, Visual Composer built many WooCommerce Shortcode, if you need, please request us, we will update on next version
Building a home page
Setting a static page as Home
If you installed the Demo Content, you don’t need to create a new Home Page, you just need to choose from the list Home Pages that were automatically created from the demo content, following these steps:
- Go to Settings > Reading
- For Front page displays, select A static page (select below)
- Choose either Home One Page, Home Basic, Home Shop, Home Product, Home Portfolio, Home LandingPage, Home Alternative from the dropdown for Front page
- Click Save Changes
Save all your changes!
If you DID NOT import the Demo Content, you will need to MANUALLY CREATE your Home and other pages. Here’s how to build it:
First, go to the "Pages" in your Dashboard and click on "Add New".

Building your Home page:
Now you can start fiddling with Visual Composer to build your home page with any design that you like.
In case you don't have time for experience with it, you can switch to "Classic Mode" and use one of the shortcode sets provided below to build your frontshop based on one of the pre-made home page we offer.
To create a page similar to Homepage in our the demo, choose the Classic Mode and switch to the Text tab, then paste this code into the content of your page:
Shortcode set for Home One Page
Shortcode set for Home Basic
Shortcode set for Home Basic - Dark
Shortcode set for Home Basic - Boxed
Shortcode set for Home Portfolio
Shortcode set for Home Portfolio - Dark
Shortcode set for Home Product
Shortcode set for Home Product - Dark
Shortcode set for Home Product - Boxed
Shortcode set for Home Landing
Shortcode set for Home Landing - Dark
Shortcode set for Home Landing - Boxed
Shortcode set for Home Shop
Shortcode set for Home Shop - Dark
Shortcode set for Home Shop - Boxed
Shortcode set for Home Alternative
Shortcode set for Home Alternative - Dark
Shortcode set for Home Alternative - Boxed
Paste one of these content into your Homepage, then publish this page and set it as your frontpage in the Wordpress Settings panel.
For a further understanding on these shortcodes and what they do, please visit GROVE Demo page and look for the actual explanation with examples from our Shortcode Menu there.
Building OnePage
Recently OnePage sites has become a trend, and GROVE can help you do it easily. You just have to create a Menu with Links as items.
After that, any where want menu link to section, please edit row by Visual Composer and type id on field: Row ID
Setup Home page Slider
After setting up the homepage, you need to setup the slider for homepage to make it display the same as in live preview.
The download package contains the exported slider (Revolution Slider) that can be used as your slider template. Please follow the steps below to import it to your shop:
- Go to "Revolution Slider"
- Click "Import Slider" button
- When a popup appear, click "Browse" and select one of business_fullscreen.zip/creative-slider.zip/interior-silder.zip(these files include in main file downloaded) file.
- Click "Import Slider" button to start import the selected slider
- Repeat the steps to import all

Please note that these steps are to set up slider for homepage the same as in live demo. If you want to make your own slider, please follow the official Slider Revolution document.
Parallax Effect
To add Parallax scrolling effect for a Row while editing with Visual Composer, simply check Set parallax effect of your Row.
Next, select Design Options tab then select Background Image.
Portfolio Post Type
GROVE pre-made special portfolio post type is the perfect way to showcase your artwork, photography, or anything visual you want to show off.
Portfolio does not appear on the timeline with your blog posts to disturb the flow. They are also given special metaboxes for information that specifically belong in a Portfolio.
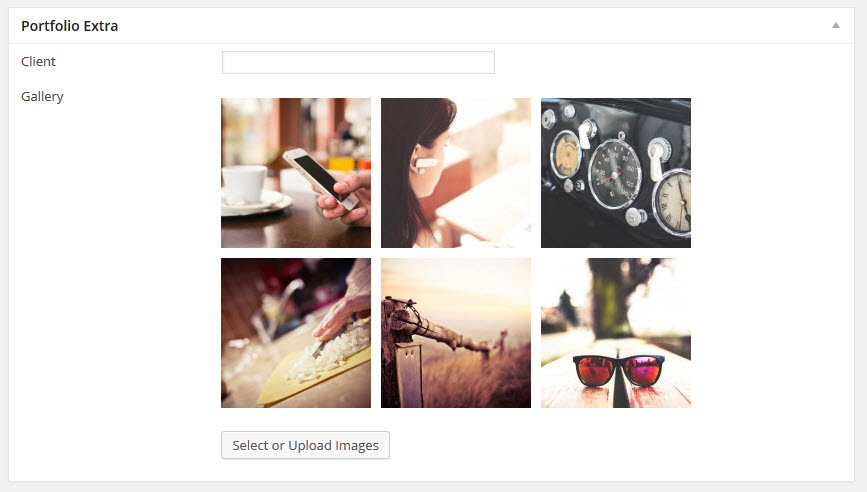
The portfolio section can be found at the left menu in your Dashboard, with some special Setting Options for you to configure its featured image, category, author and gallery.
Setting display option for portfolio

Display shortcode in style 01: Grid Layout, Show Category, Show Paging, No Padding

Display shortcode in style 02: Info Layout, With Padding

Display shortcode in style 03: Timeline Layout
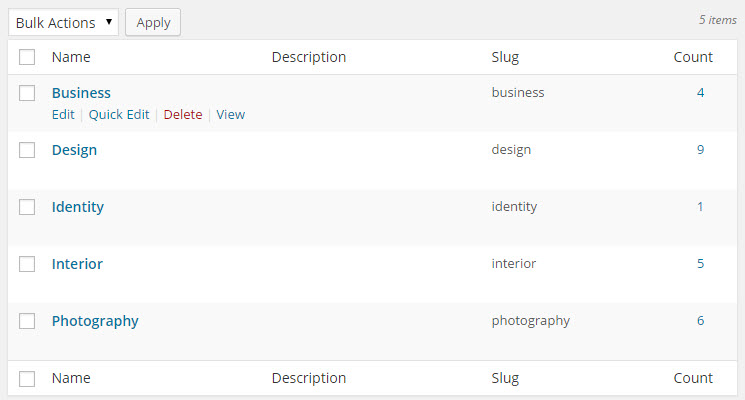
Add New Portfolio Categories and New Portfolio
Add New Portfolio Category
Add New Portfolio
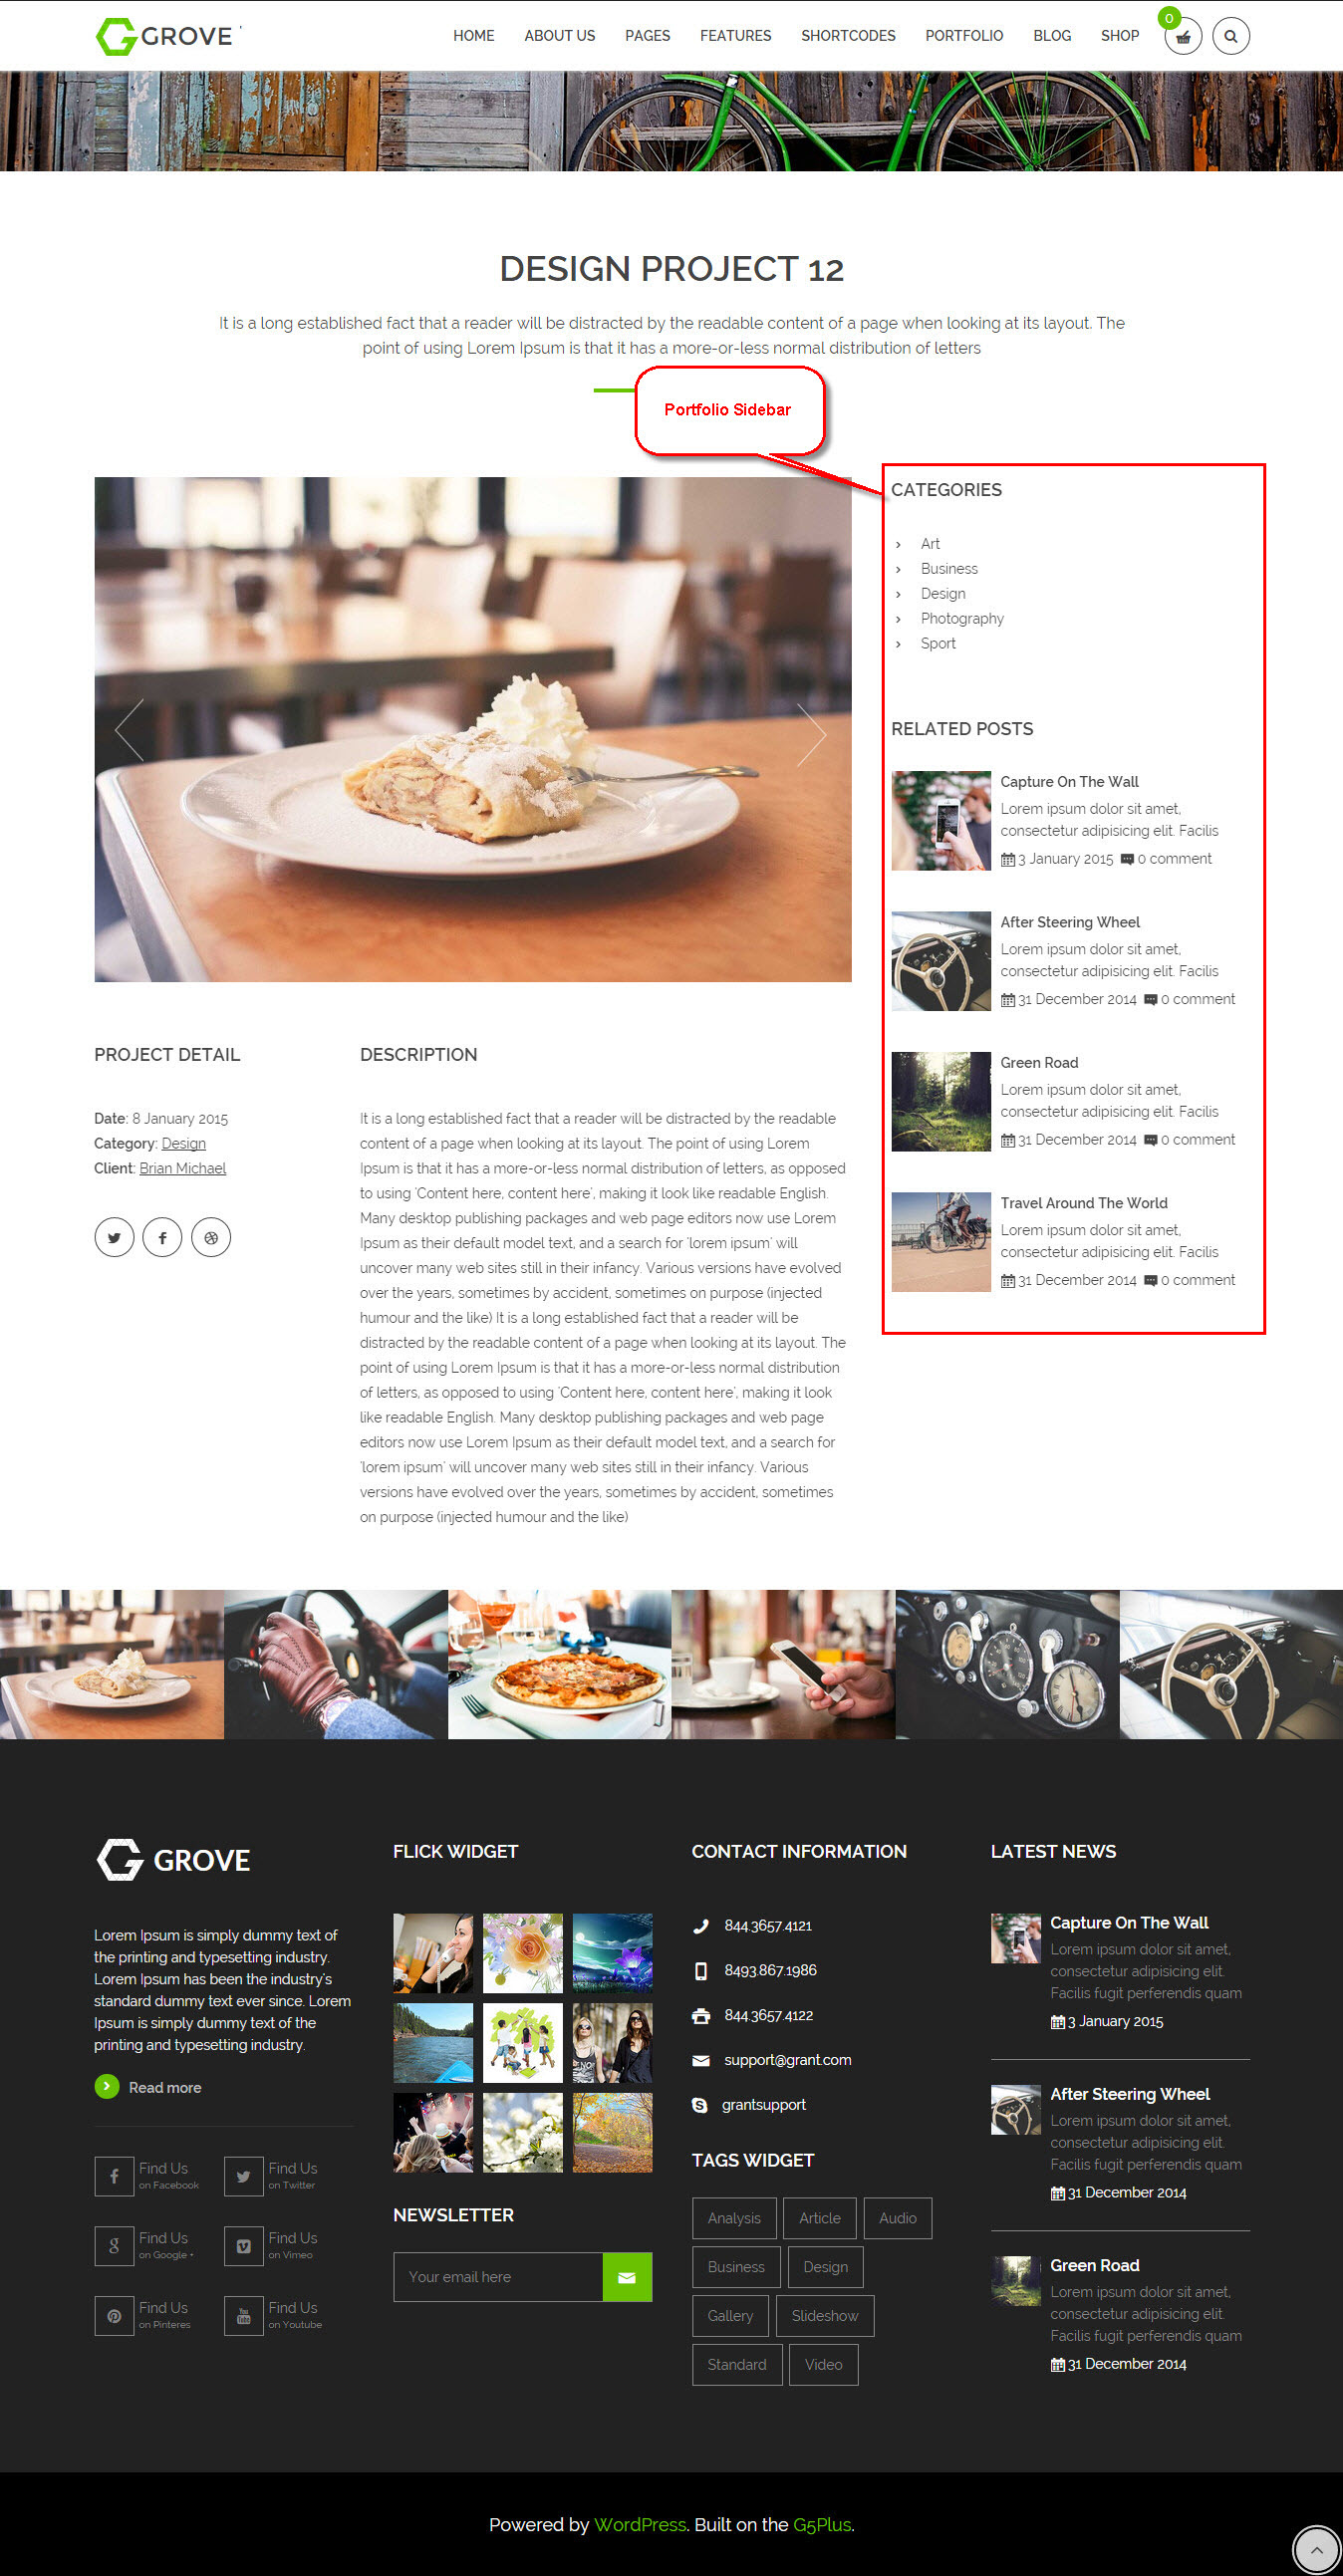
5 Styles For Detail Single Portfolio
Fullwidth
Big Slider
Small Slider
Vertical Slider
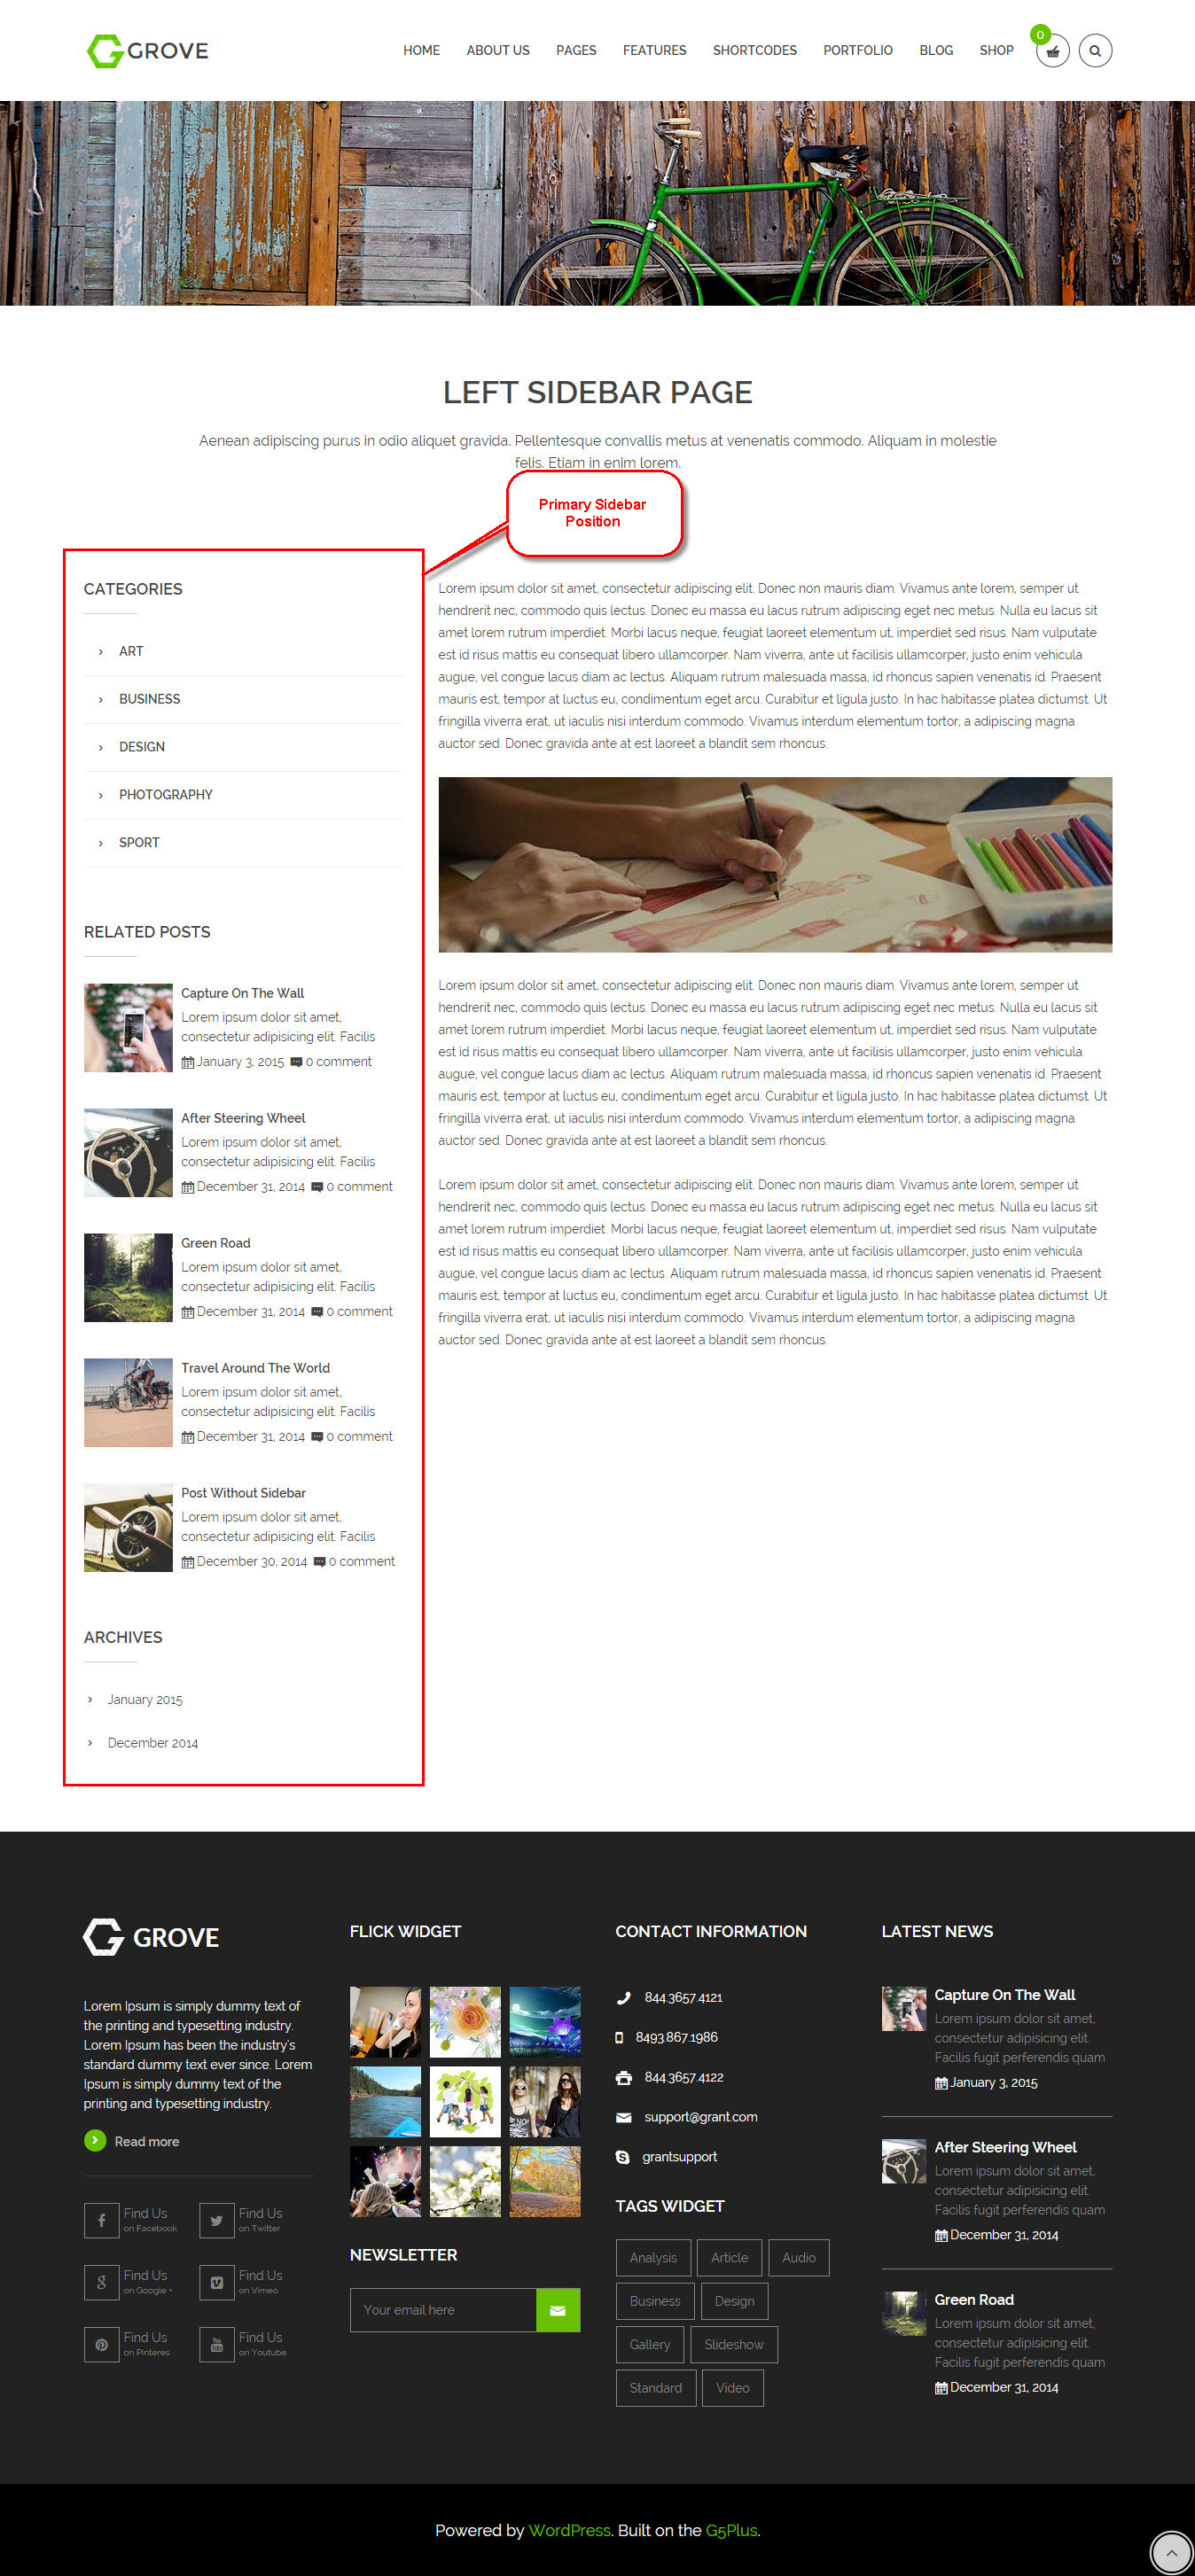
Sidebar
Our Team
Our Team is the custom post type to introduce the staff in your organization to the customer. Posts from this type are built with special metaboxes for extra staff information.
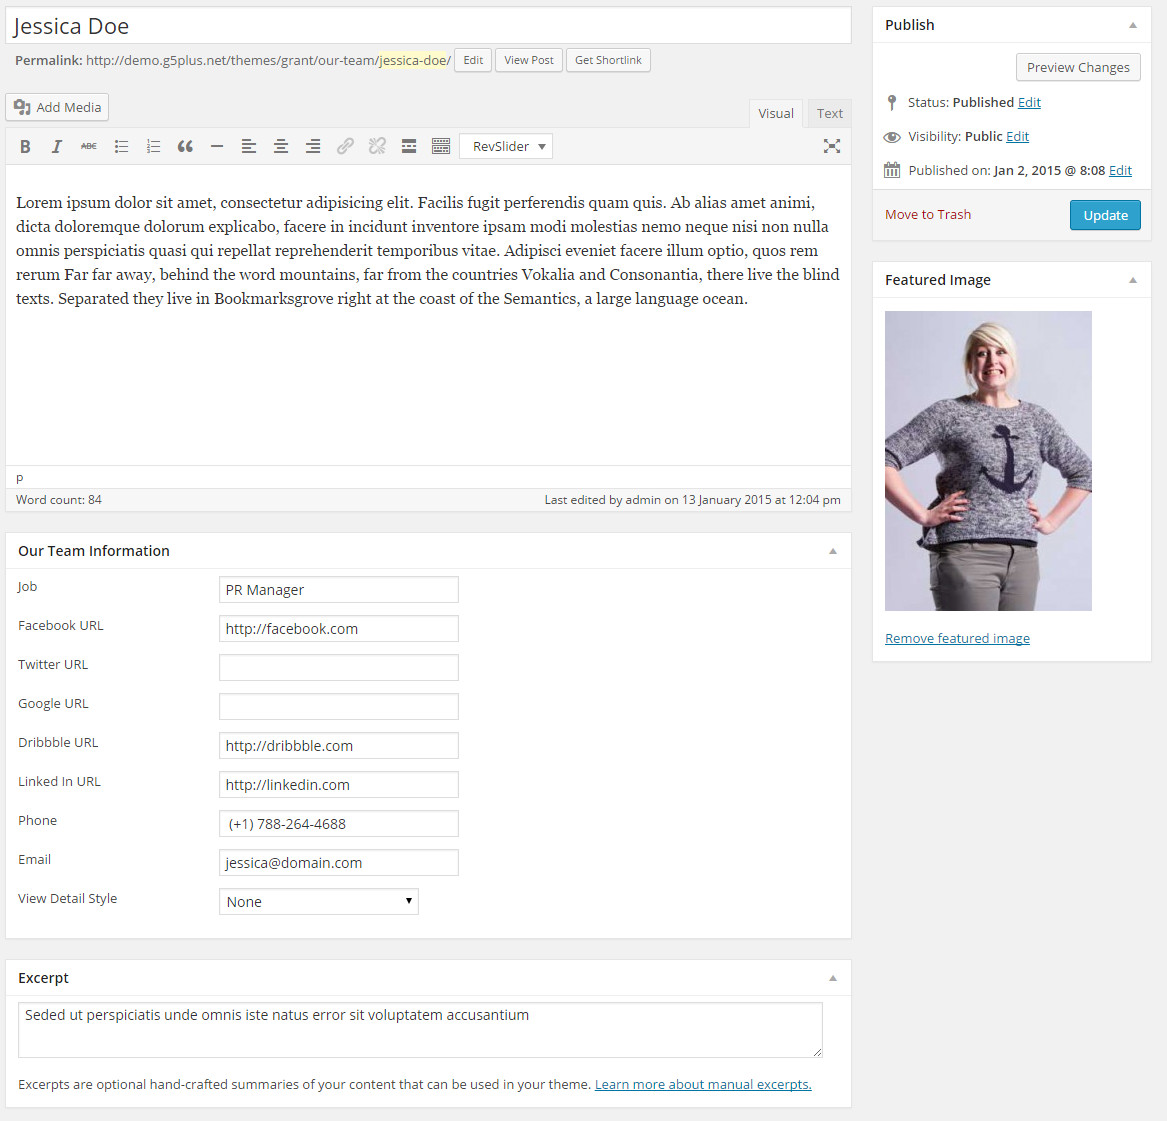
Setting display option for our team
Display shortcode in style 01

Display shortcode in style 02

Display shortcode in style 03

Pricing Tables
GROVE includes some amazing pricing table elements that are full with customization options. Pricing tables are a critical part in showcasing your services, prices and overall offerings. Also you can create unlimited price columns because we build slider view for it.
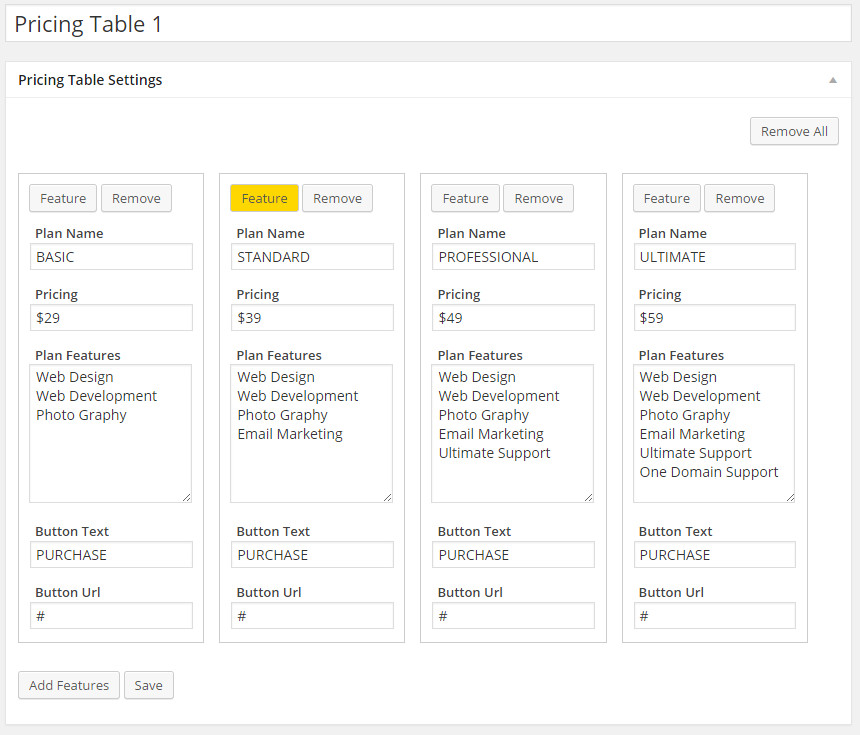
Setting display option for pricing Tables

Pricing Table Style 01 & Style 02

Testimonials
The Testimonials section can be found at the left menu in your Dashboard, with some special Setting Options for you to configure its featured image and excerpt
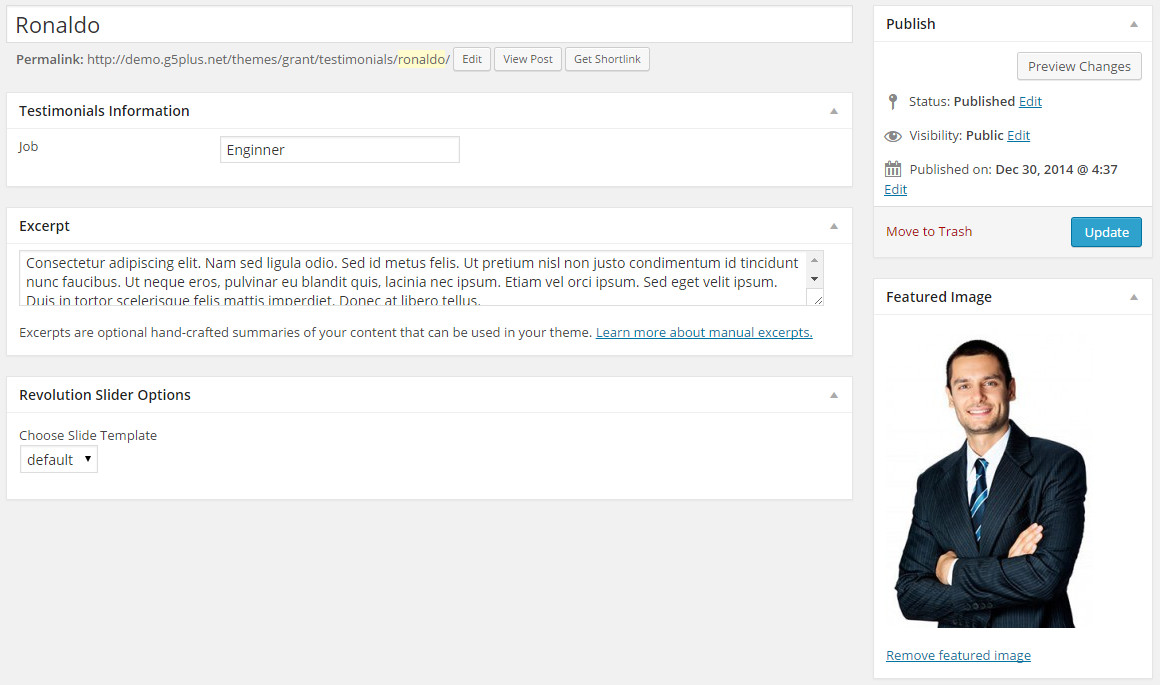
Setting display option for Testimonials
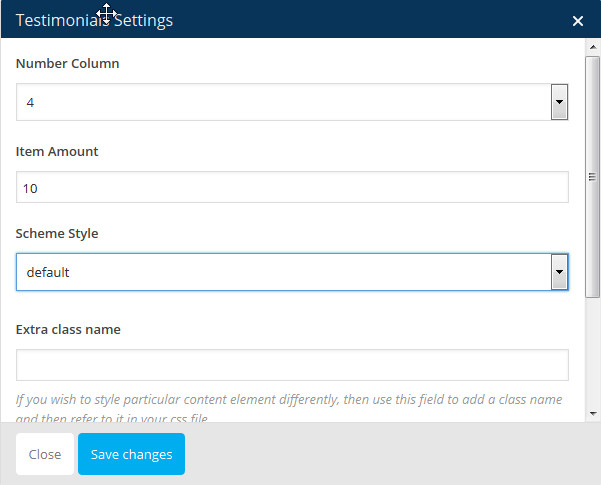
Style display

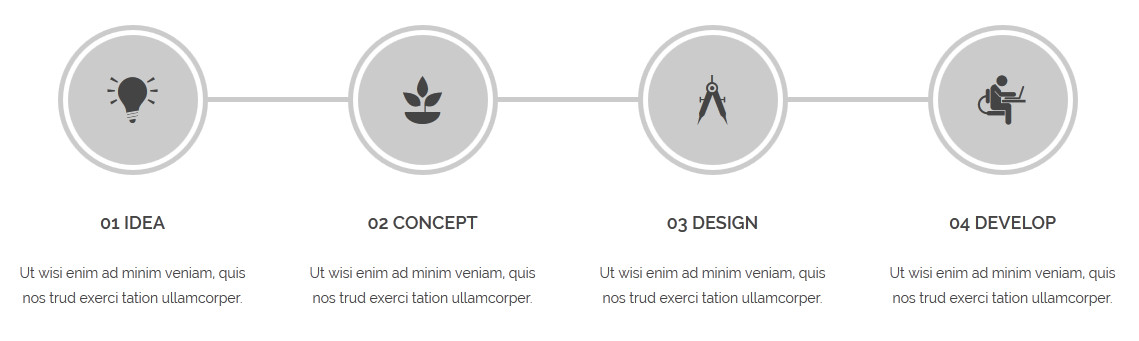
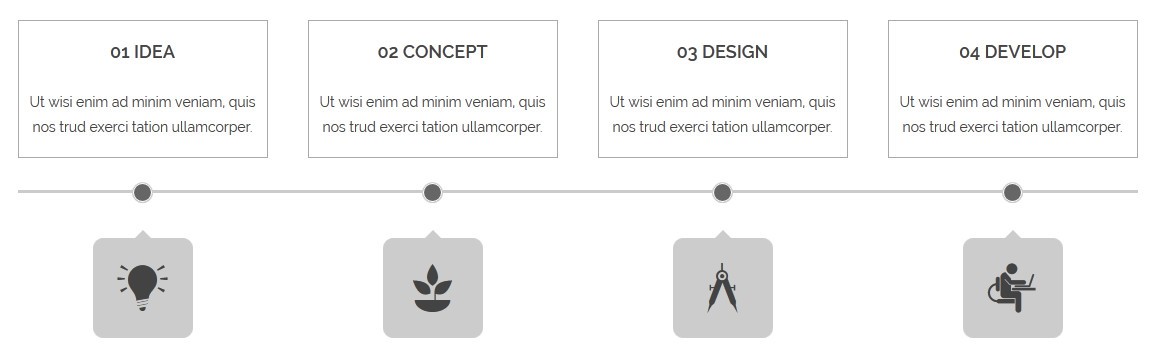
Process
User can update content process, change icon, and choose number columns display
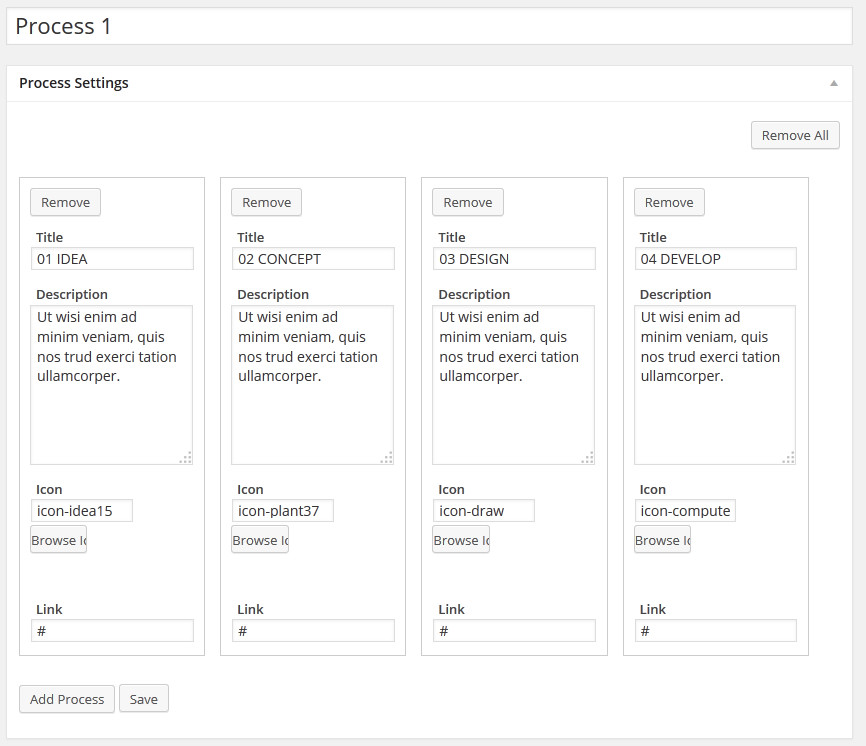
Setting display option for Process
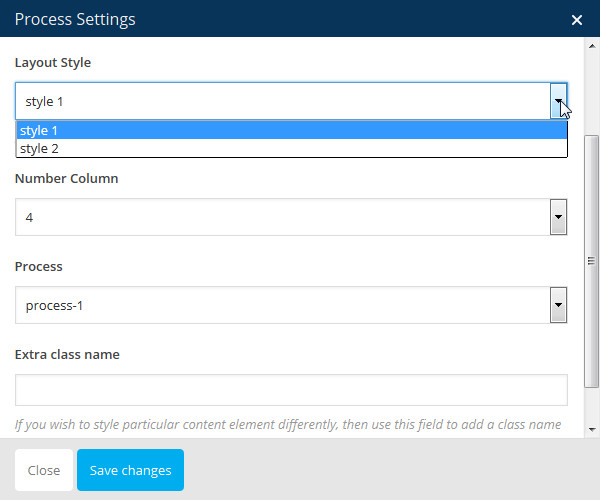
Style 01
Style 02
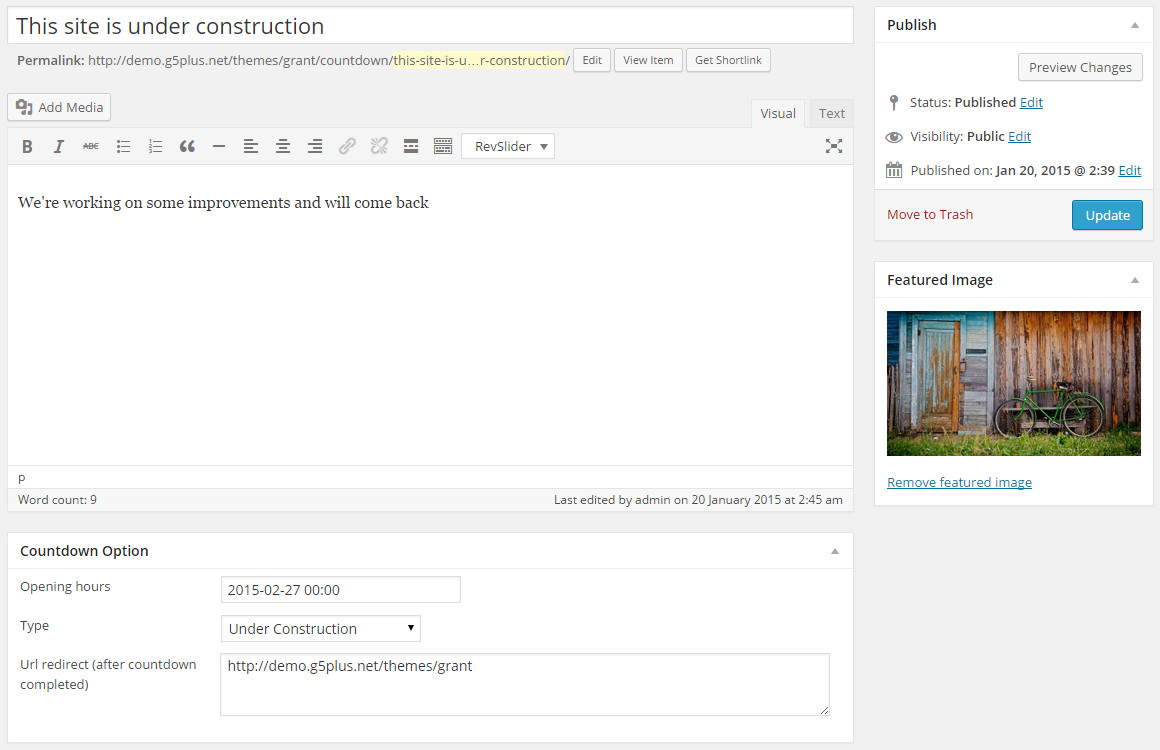
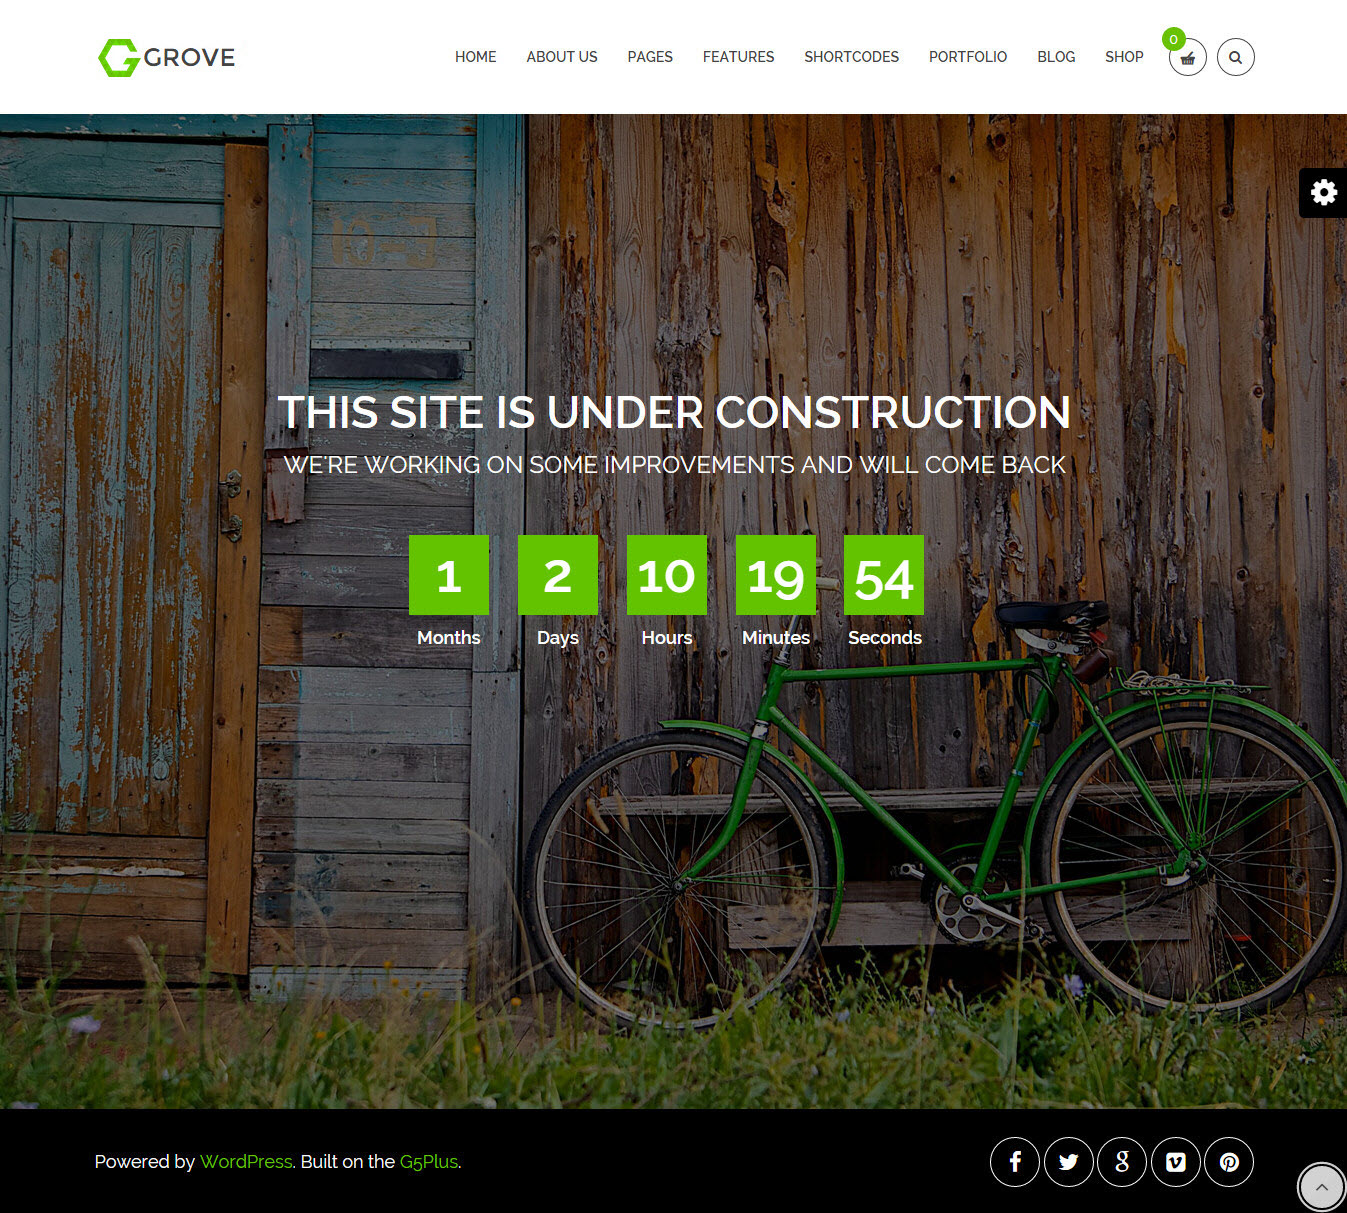
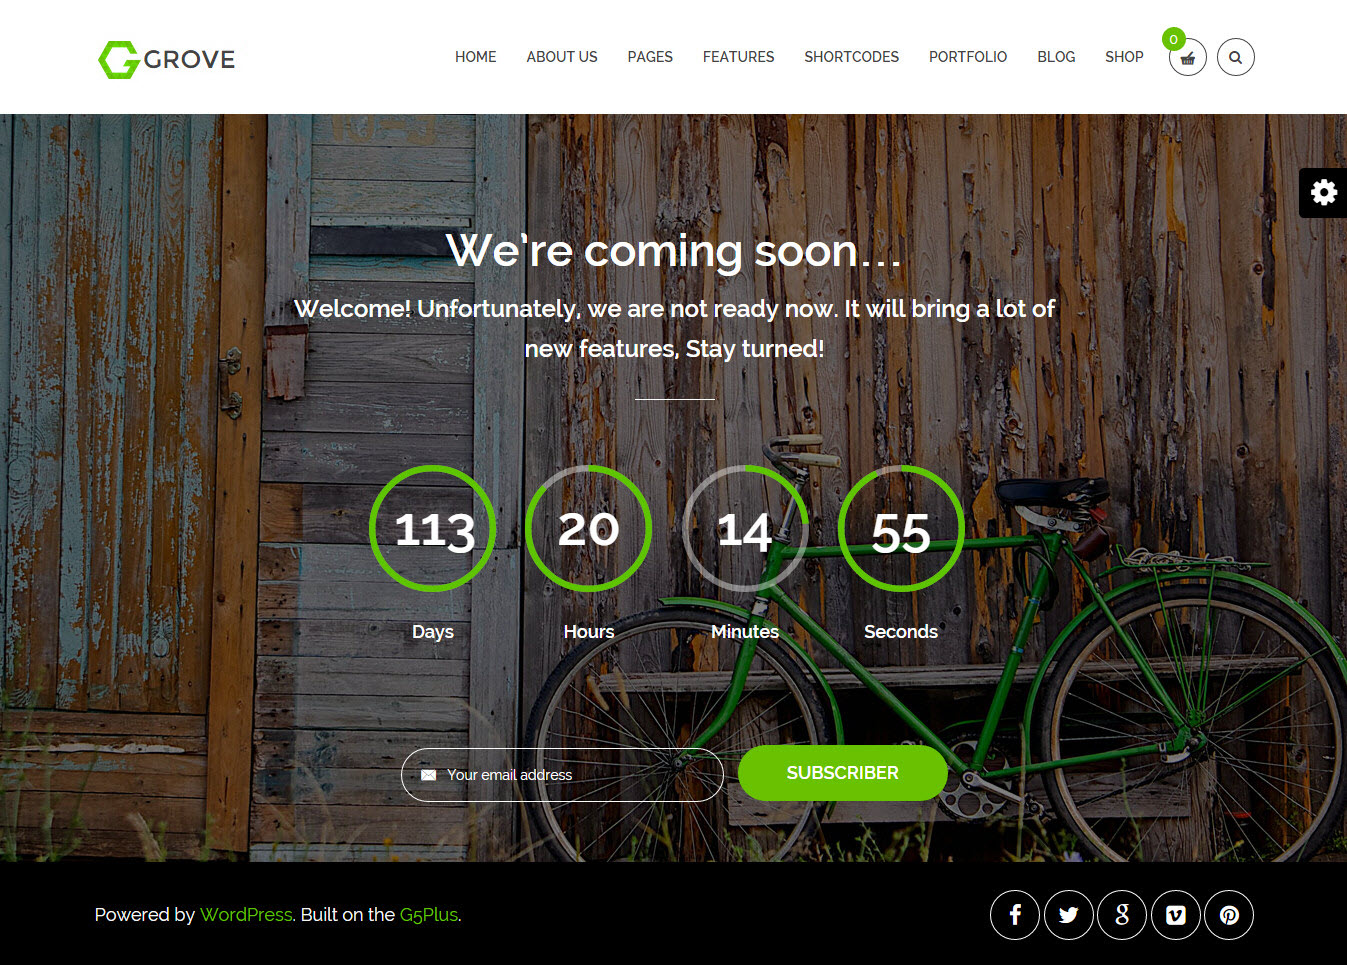
Countdown
This post type provide content for coming soon or under construction pages
Setting display option for Countdown
Frontend display for under construction
Frontend display for comming soon
Thank you for purchasing our theme.
If you have any questions that are beyond the scope of this documentation, please feel free to us via email g5plus@outlook.com.
Thanks so much!