Copyright G5Theme

G5 Blog - plugin add functionality in your blog

G5 Blog is included in the theme so this is a required plugin, you need to install/active this plugin if you want to have Blog features.

G5 Blog Your vision of a powerful and beautiful blog with minimal time and effort is finally coming to life with G5 Blog plugin. Design your website with your own hands, with ease, using this plugin.

G5 Blog contains features completely different Blog types, Blog layouts and Blog single. From admin panel, you can easily add your Blog items. Display Blogs item by using our shortcode/widget

In this documentation, you will find information about installing the plugin, the features of the plugin includes and how to use Blog easily.

G5 BLOG PLUGIN

NOTE: In this documentation, we have used our theme that developed by our technicals so in some examples below you could see exclusive designs with logo and images of our theme.

We have prepared detailed user manual in order to ensure smooth and the plugin easy works with our theme. However, If you have any question that are beyond the scope of this documentation or difficulties with our theme – we will be there for you! Please feel free to contact us via our helpdesk or email and we will get back to you as soon as possible!

Thank you so much!!

INSTALL & ACTIVE PLUGINS

Begin installing plugins


You should be navigated to the Install Required Plugin page, which shows reqquired plugins list, all you need is clicking on the checkbox beside "Plugin" label to select G5 Core, G5 Blog in the list, then choose "Install" from the drop-down list at the top and then click "Apply".

You can do the same as installing, After you install successfully,you select that two plugins to active .

install plugins

Install & active plugins

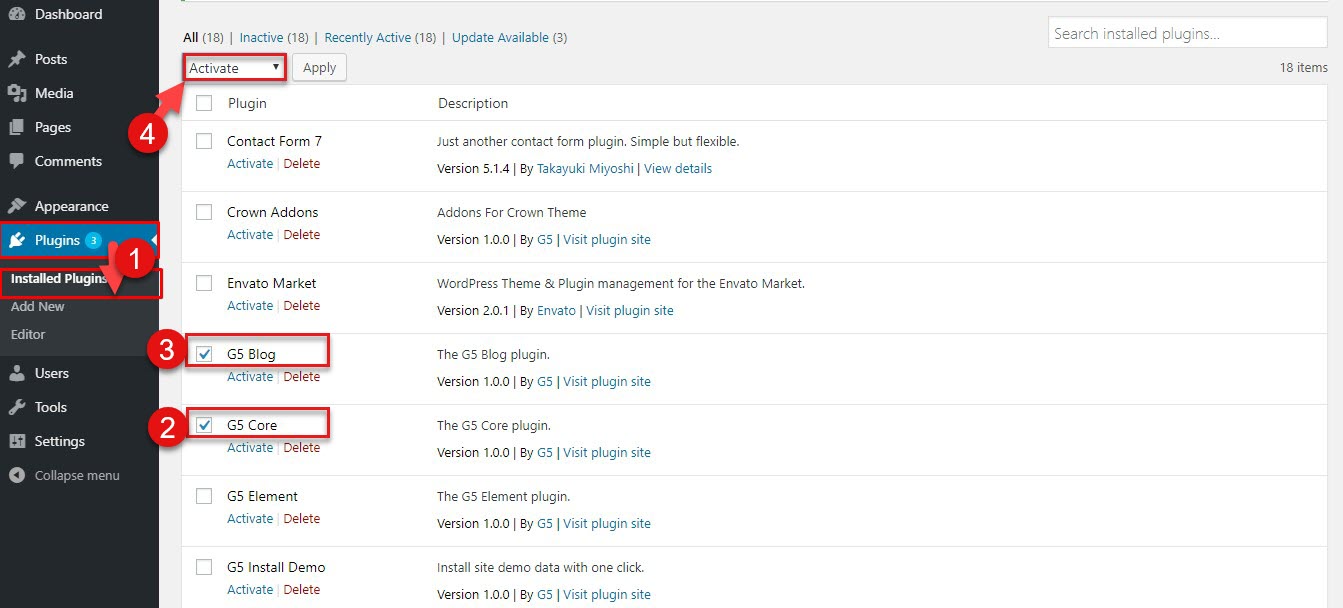
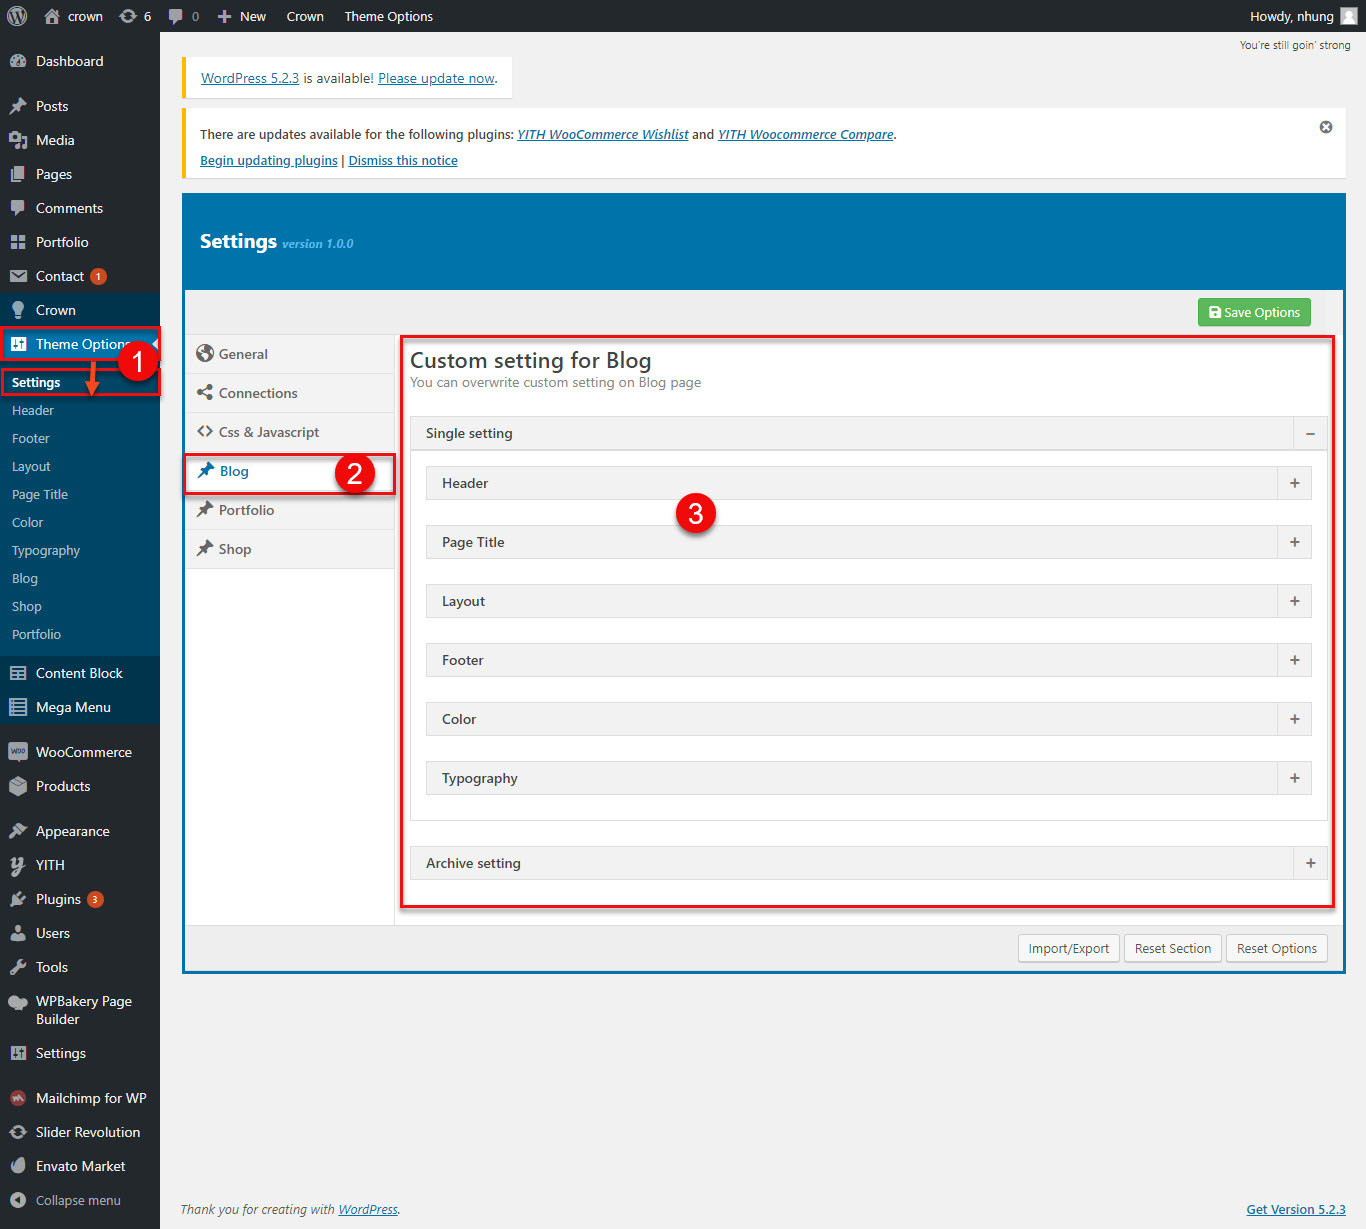
After you install & active G5 Blog plugin, G5 Core plugin successfully, the Blog settings start to display

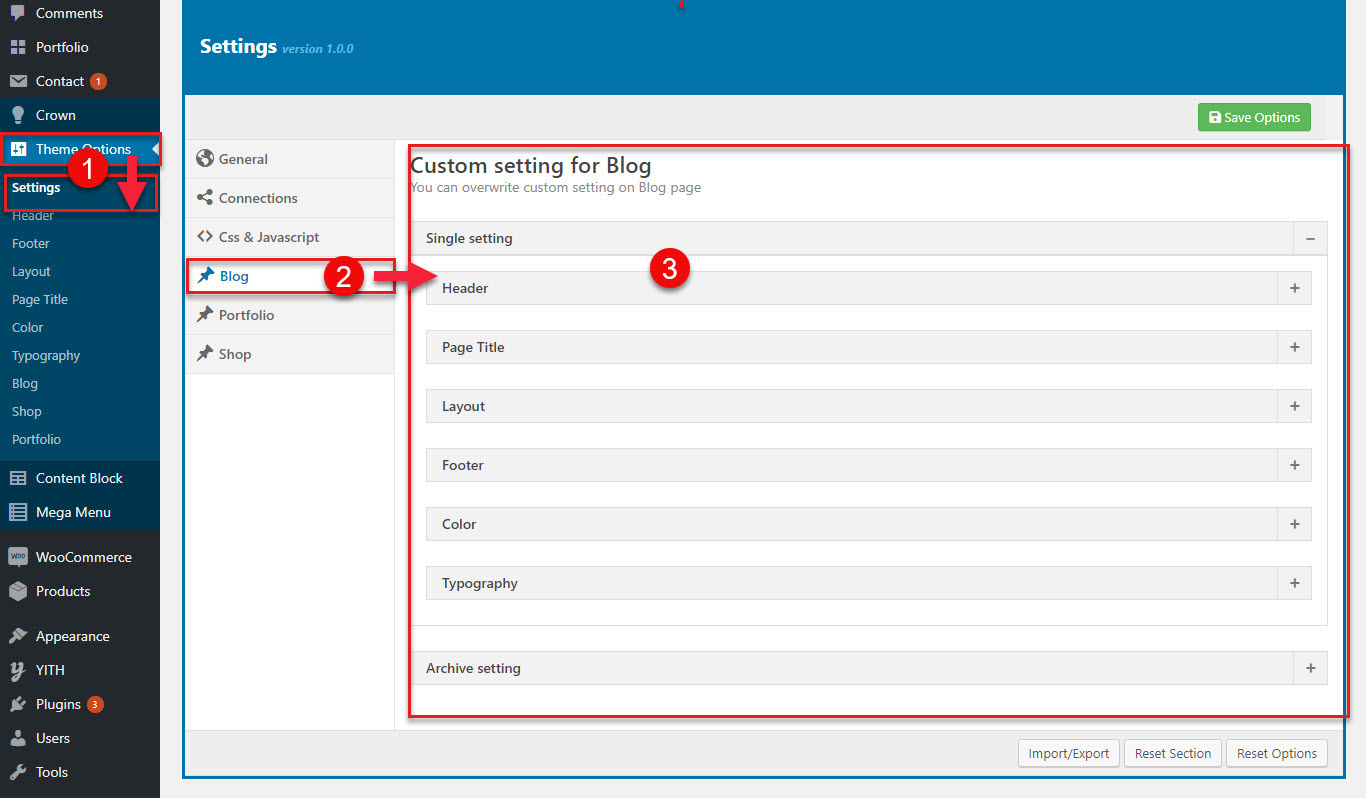
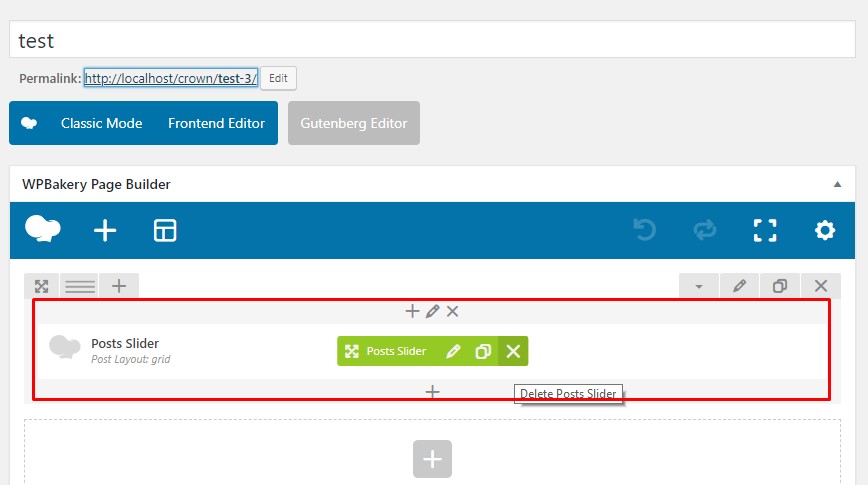
The Blog items are included Blog post type, Blog settings, Overwrite Theme options for Blog

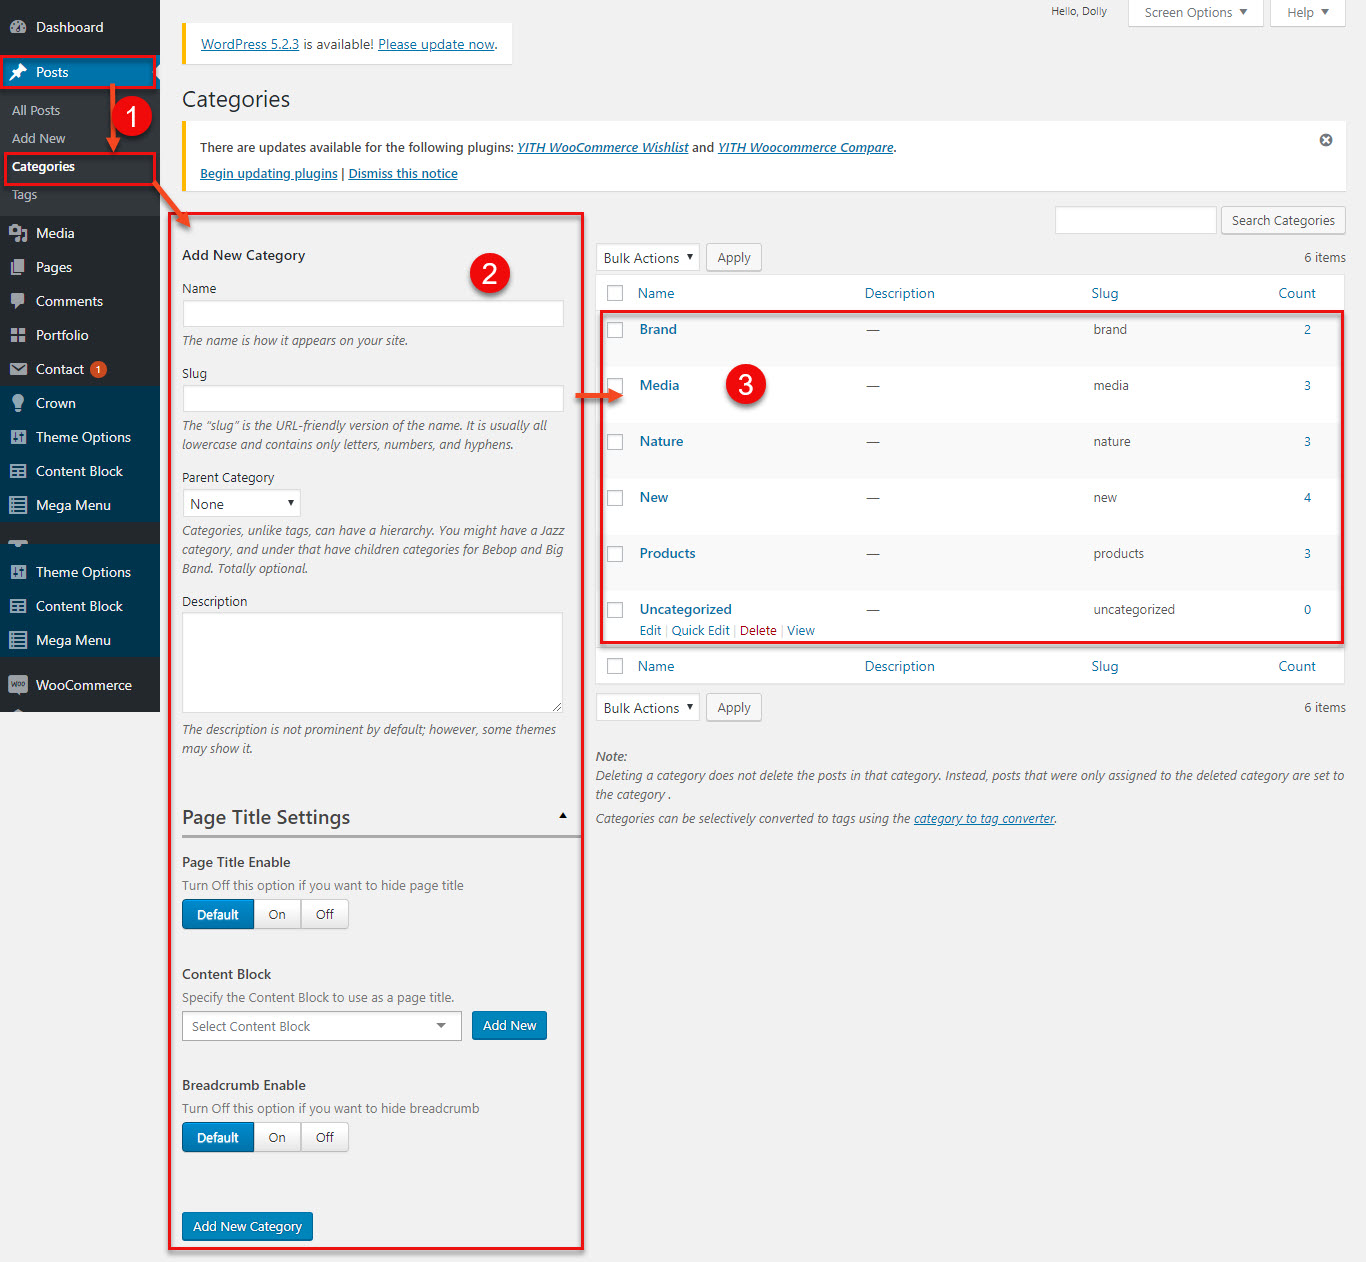
1- Blog post type are options register a custom post type for Blog items. It also registers separate Blog taxonomies for tags and categories

install plugins

Blog post type

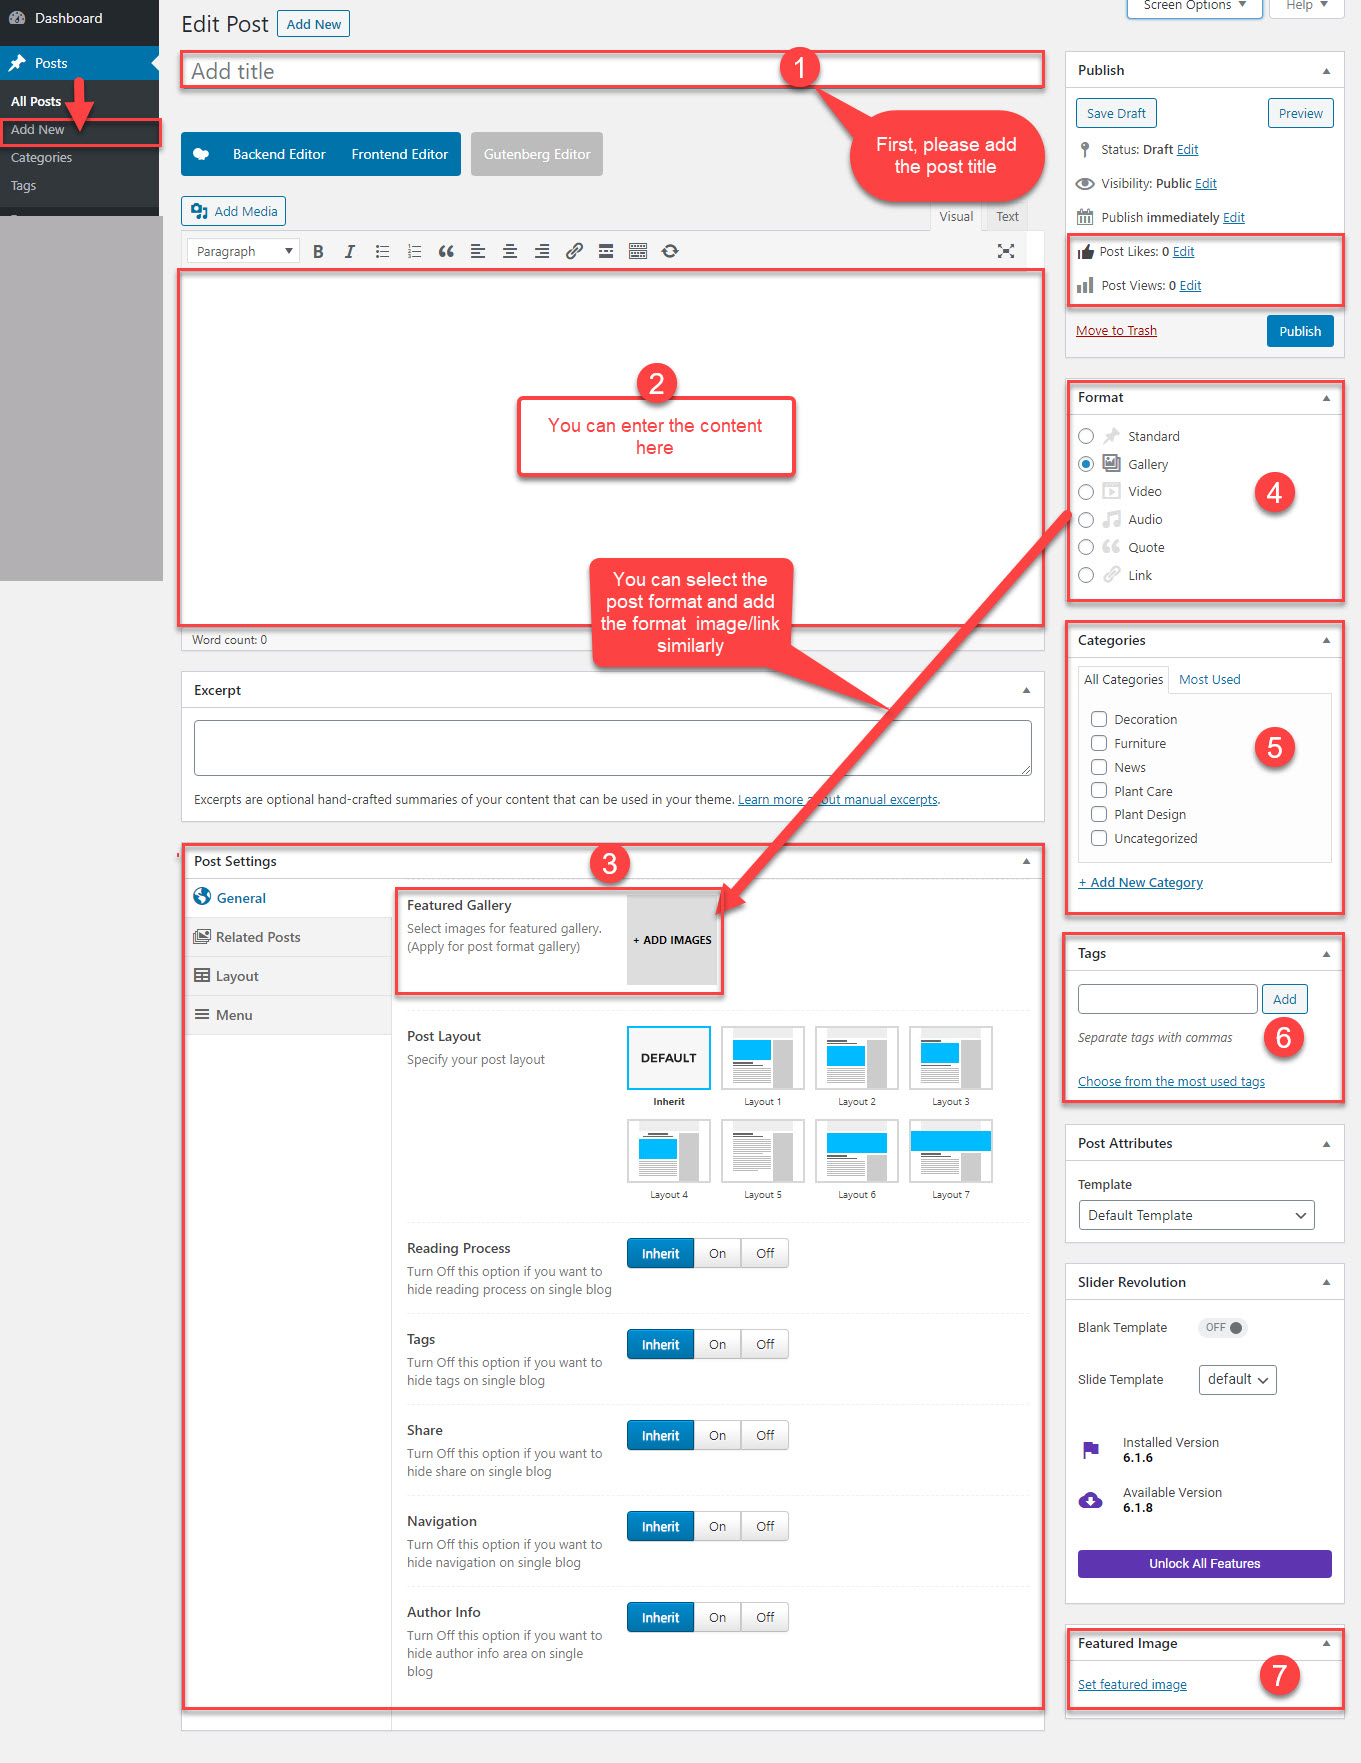
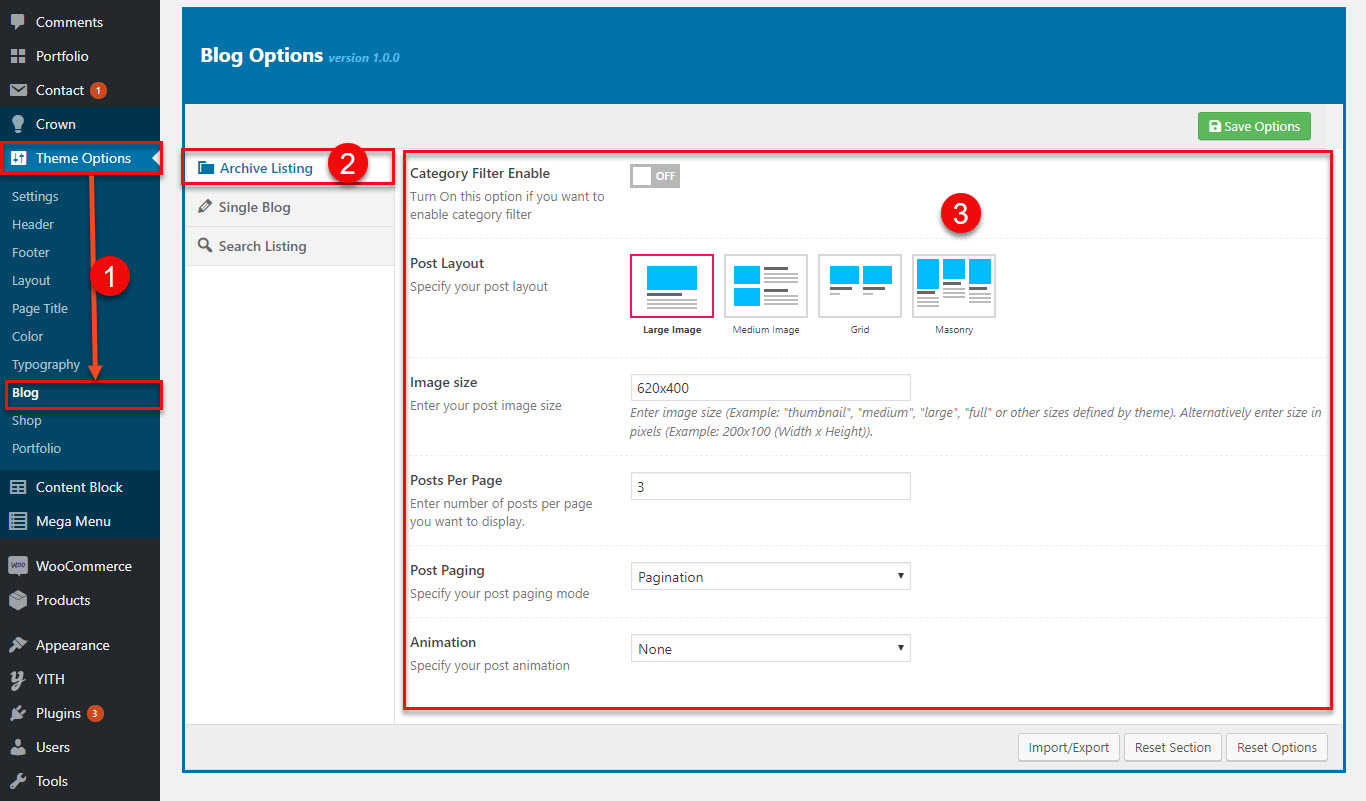
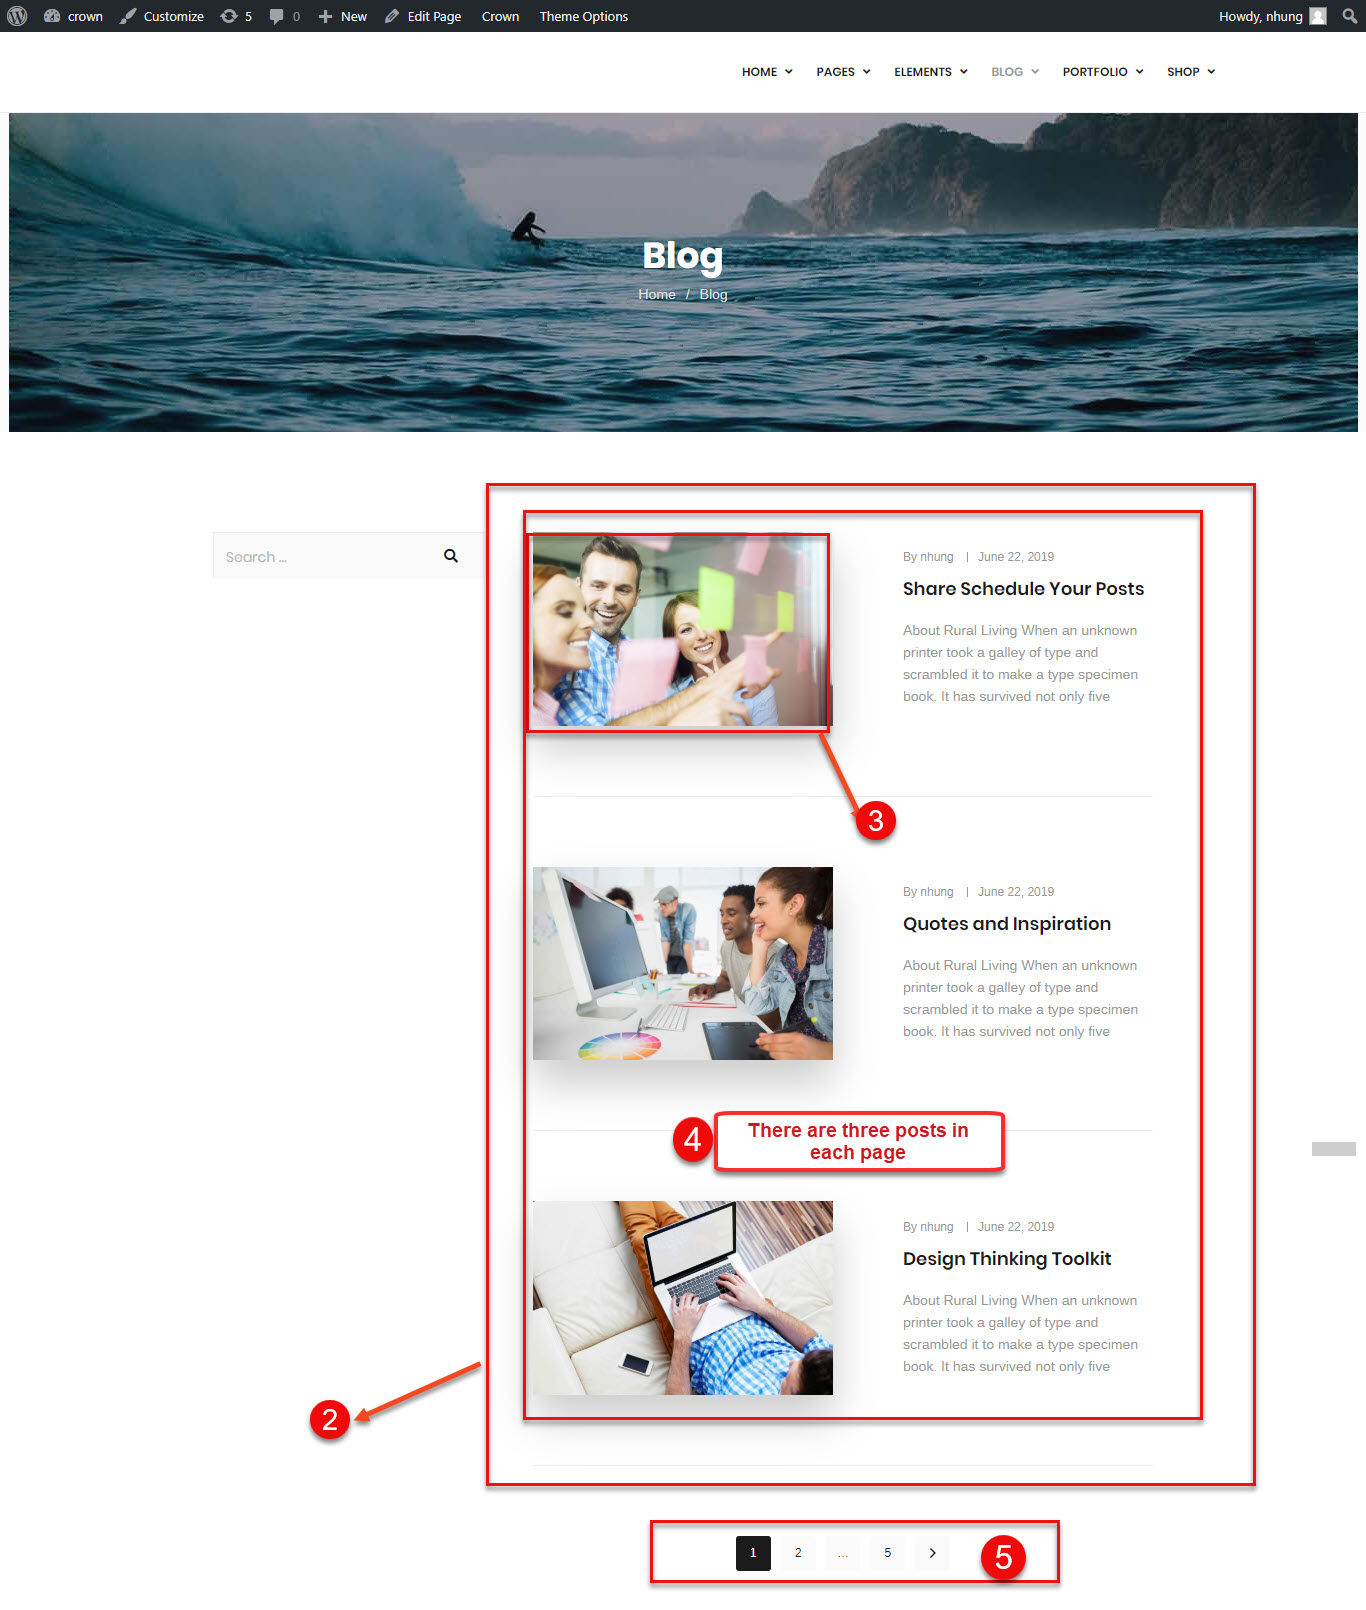
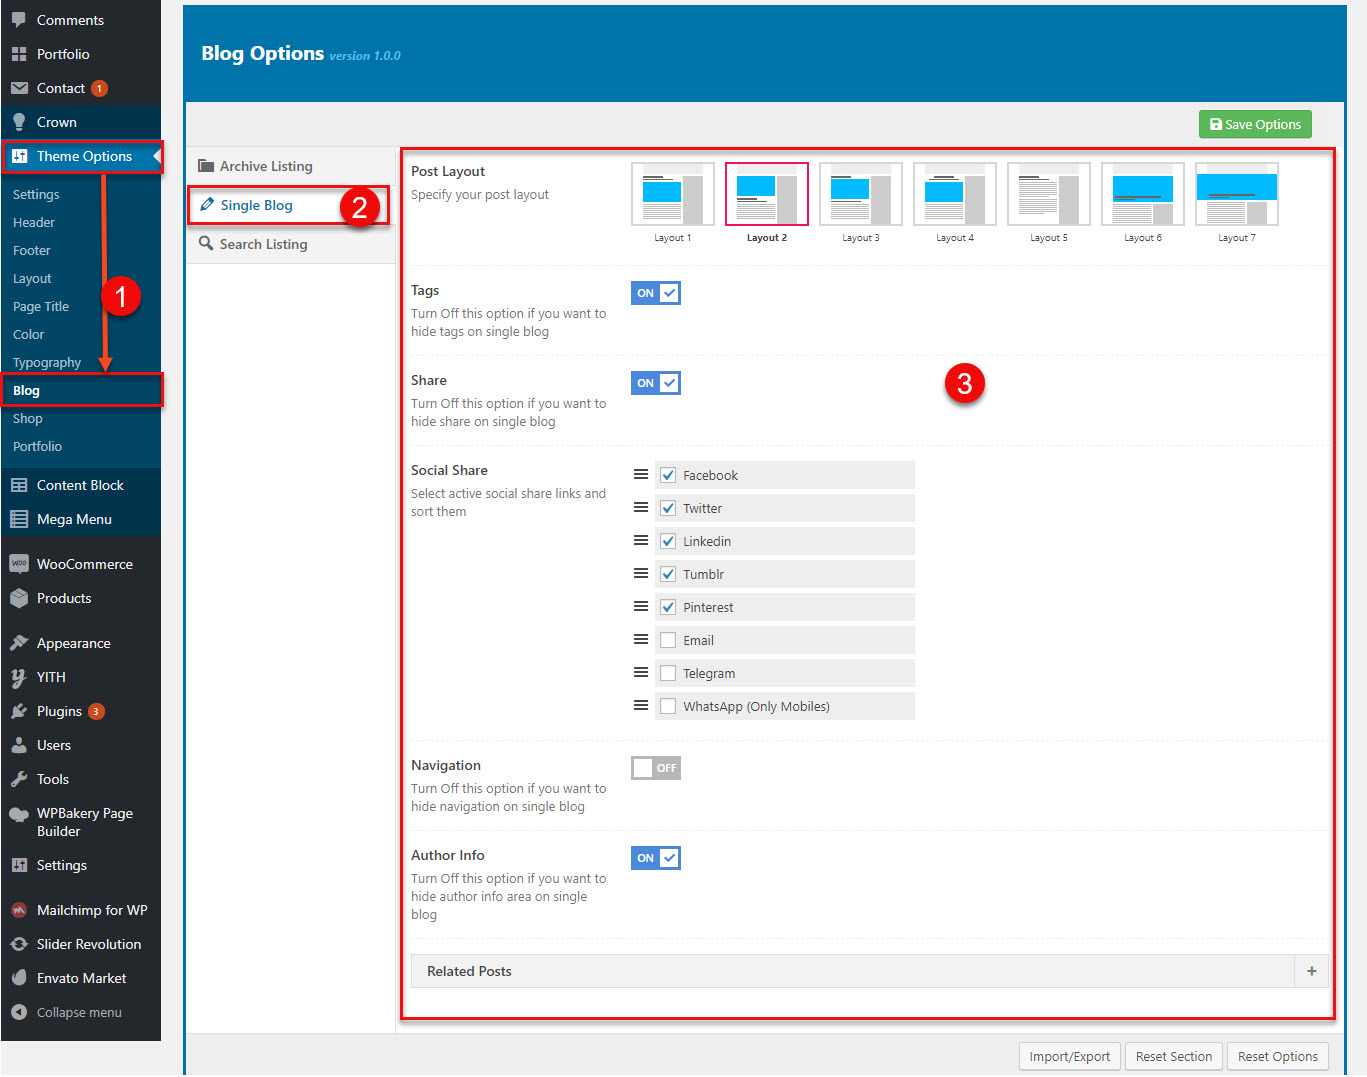
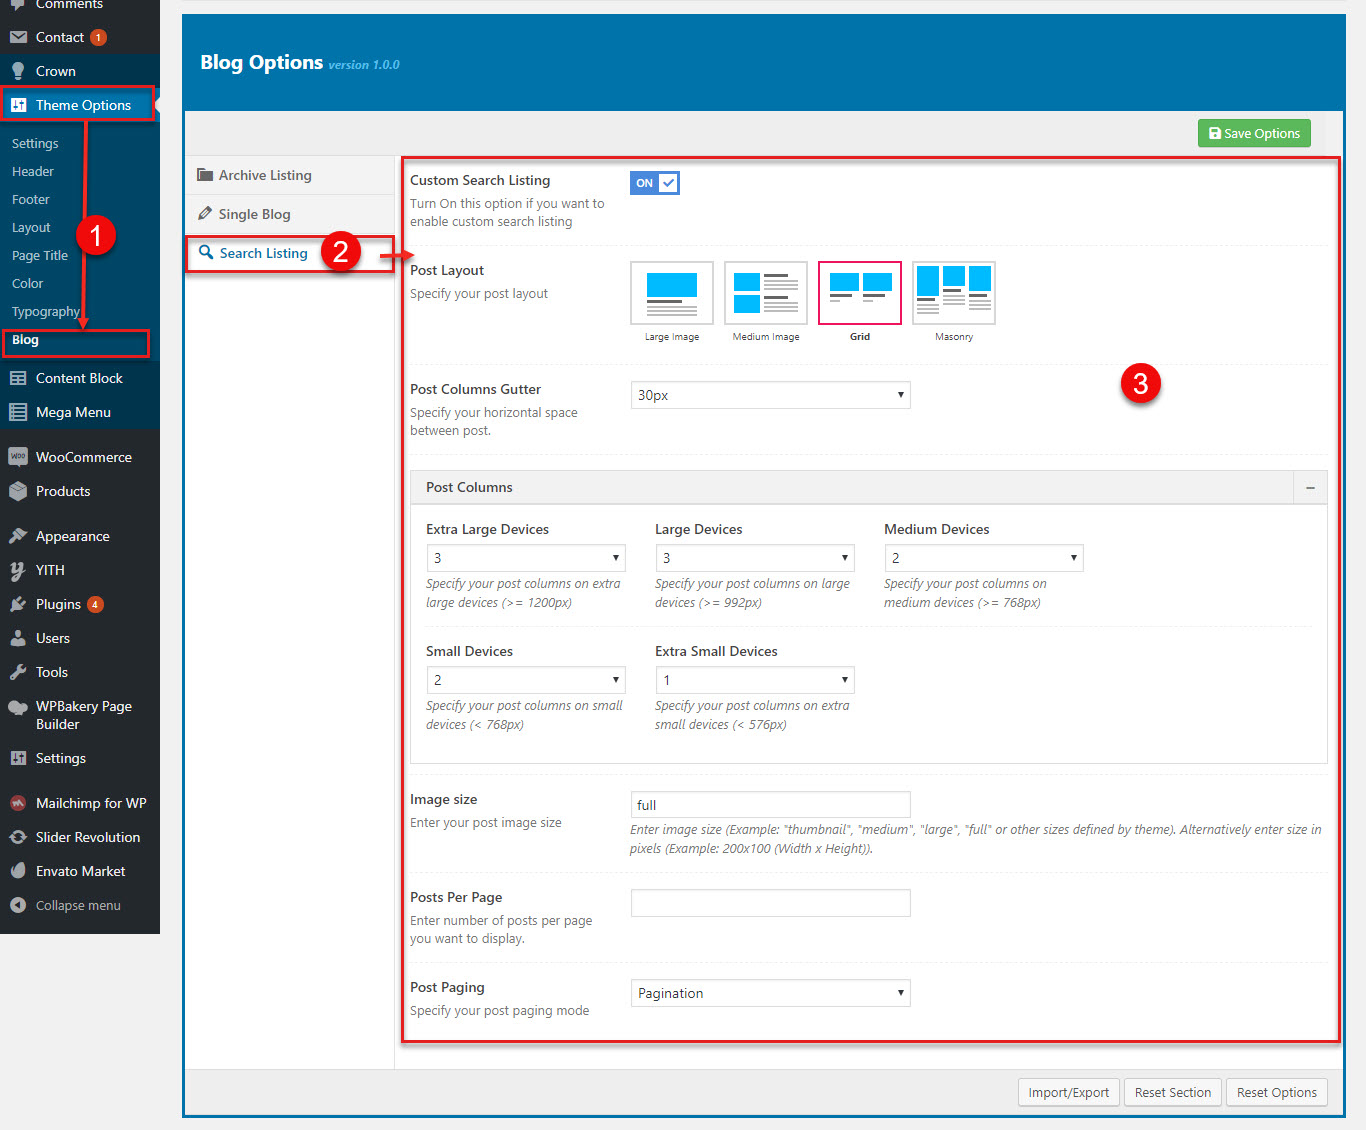
2- Blog settings are settings for layouts, gallery etc in Archive Listing and Single Blog

install plugins

Blog settings

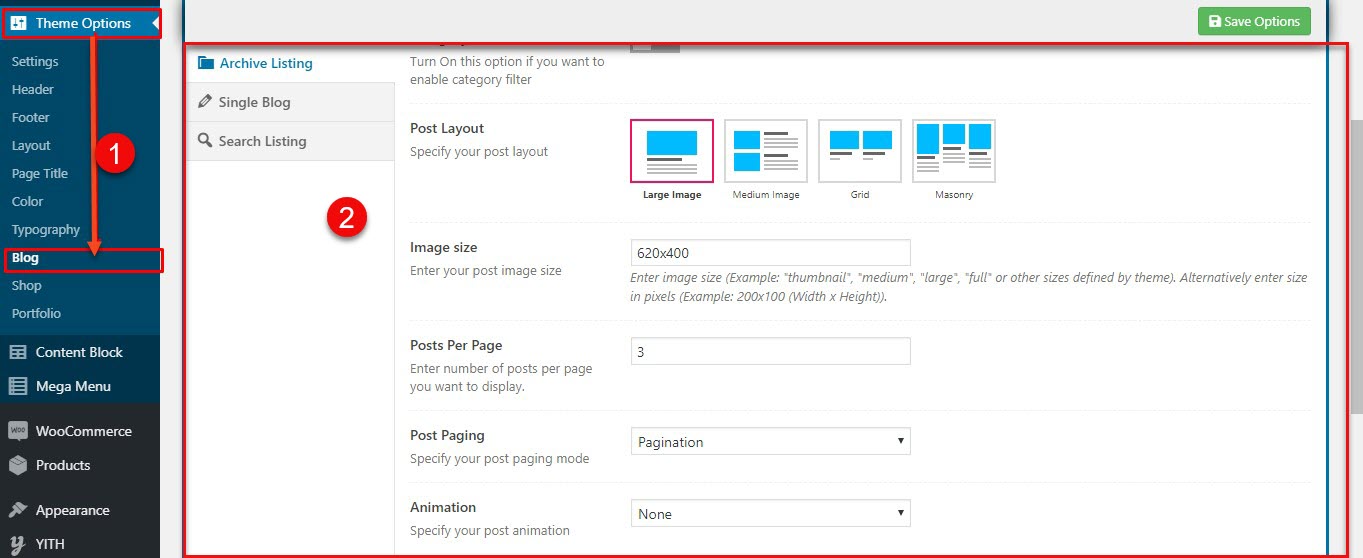
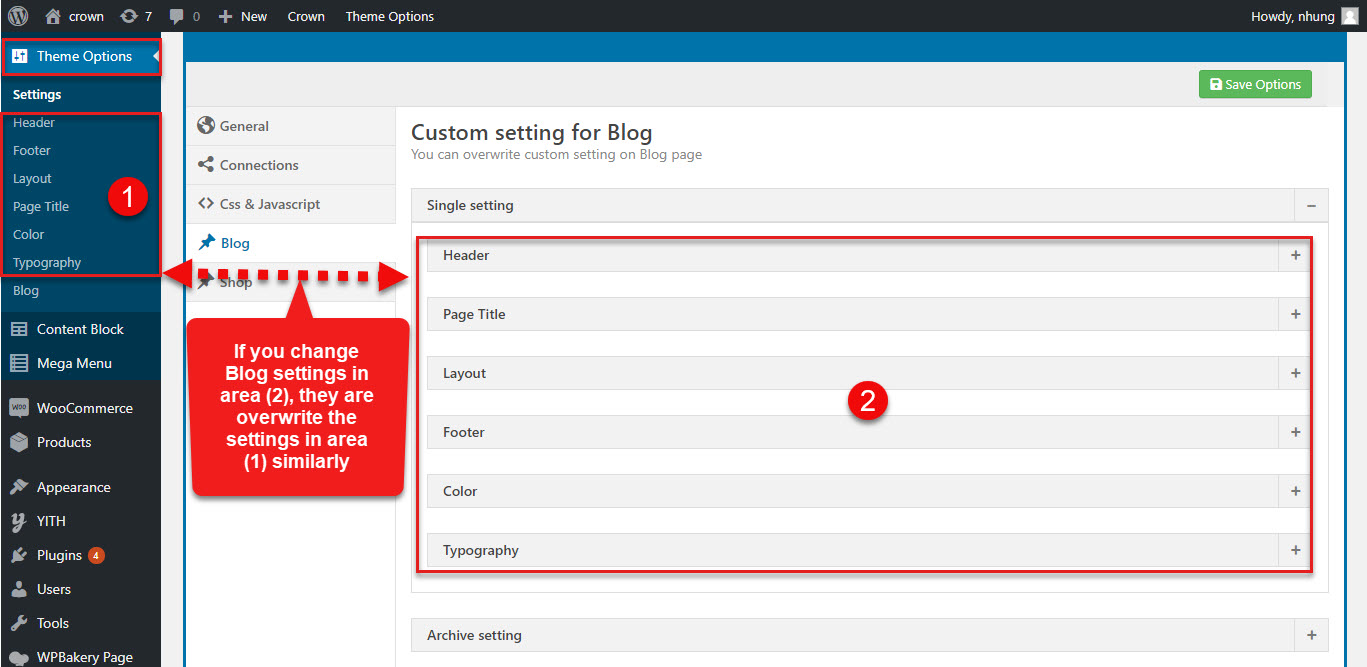
3- Overwrite Theme options for Blog are settings for layout, page title, header, footer, color and typography in Archive Listing and Single Blog. This settings overwrite the same setting in Theme option

install plugins

Overwrite Theme options for Blog

Setup Instructions

Create a Post

After you install and active Blog,through the admin panel

Blog custom post type is ready

1. Create a category
Navigate to the ‘Blog Category’ in the “Blogs” to add new category. Enter the name and description to add the category.

Create a category

You can view the process (1) ==> (2) ==>(3)

(3) is list of post categories which you created

Categories in frontend

Beside, you can custom for each category with page title and breadcrum seperately

2. Add New Post
Navigate to the ‘Add New’ in the Post to add new Post. Enter the title and project description.

Your Blog is gorgeous if you add from Post extra field in Post setting

Then, you select category, set featured image. This featured image will be visible everywhere for this specific Post. Click “Publish” to add the new Post.

You can view and match the number for each element

Custom settings

You can change the options such as: layouts, image size, social icons etc seperately for Post and Blog which you have known in 3.HOW TO USE tab of this document

You can customize in Theme option and Blog settings

Theme option includes all global options that affect your entire website. These options can be overwritten by setting options in Blog Settings with any page custom Blog Settings. The different of this two options is priority. The priority of Blog settings is higher than Theme options

By clicking on the Theme Options menu, you'll be able to change all settings that affect to entire your website


This is options in Theme option

This is options in Page setting

Beside, after you install/active G5 Blog plugin, there is Blog tab will display in the bottom of Theme option

Archive listing

Archive listing is page has something you want to focus on when it comes to showcasing your projects. This part of the website helps you gorgeously display the projects you’ve worked on, rendered in a grid or slide based layout

This is options in Archive Listing

Archive Listing Settings Description
1. Category Filter Enable Two options: on,off for category filter.
2. Post Layout You have 7 layouts for the Archive listing page
3. Image Size You can enter the length and width for image
4. Posts per page You can enter the posts you want to display in a page
5. Post Paging You can enter your post paging mode
6. Amination You can enter your post amination in the drop down menu


You can view the options which are listes in a table similar with the number from (1) to (6) in the bellow image

This is options in Archive Listing

Single Blog

Single Blog supports to showcase your posts with big featured images on single page

This is options in Single Blog

Single Blog settings Description
1. Post Layout You have 7 layouts to select for your Single Blog pages
2. Tags Beside, you can turn on or off in single Blog pages
3. Share you can turn on or off social share
4. Social Share you can add social share link to display in single Blog pages
5. Navigation you can turn on or hide navigation for Single Blog
6. Author info you can turn on or hide comment for Single Blog
7. Related Posts you can turn on or hide Related Blog


You can view the bellow image to match with the above options of Single Blog


This is options in Single Blog

Blog shortcode settings

How to display Blog on the page

After you install/active Blog shortcode, you can add Blog shortcode in the page

First, you can add the shortcode in a page you want or you can add a new page

Add a new page nomally

There are four Blog shortcodes

Example about the Blog shortcode in page


Post slider shortcode is added in page

After you add the post slider shortcode in a page, You can view it in frontend


Post slider shortcode in frontend

Post widget Settings

Create A Post Widget

Navigate “Widgets” under the Appearance. There is a Post widgets called “G5Plus Post”. Simply add this widget where you want to show this widget.

there are three Blog widgets

In “G5Plus Post”, you can add title, source, number of Post to show, layout Blog and the image size of Blog images. You can set your prefered categories or all to show. Also you can set the number of Blog you want to show. Click “Save” to save.


You can view the G5Plus Post widget in frontend, you can use it for sidebars in Blog page, Single post page etc

this is G5Plus Post

Overwrite Theme options for Post/Blog

There are two areas to custom options for Blog page and Single post page are Theme option and Custom setting for Blog which located in Theme option ==> Child Options such as Header, Footer, Layout, Page Title, Color, Typography

Any option is set to Default which is the current style of your Theme Option. So, if you want same settings on all pages, then you don't need to select anything. If you want a different option for Single post page or Blog page, then you can choose any other option here as your wish.

You can view the area (1) in bellow image:


If you want a different settings for a page, then you can setup options in Custom setting for blog and apply it to that specific pages: Single Product and Shop

This is options in Page setting

Thank you for following this document

We have prepared detailed user manual in order to ensure smooth and easy work with our theme. However, If you have any questions that are beyond the scope of this documentation or have any troubles configuring your website applications with the above settings you can contact the G5Theme Support Team by signing up and submit a new topic. G5Them Support Team will be glad to assist you.

Please create topic here: https://sp.g5plus.net

Thanks so much for purchasing the theme!